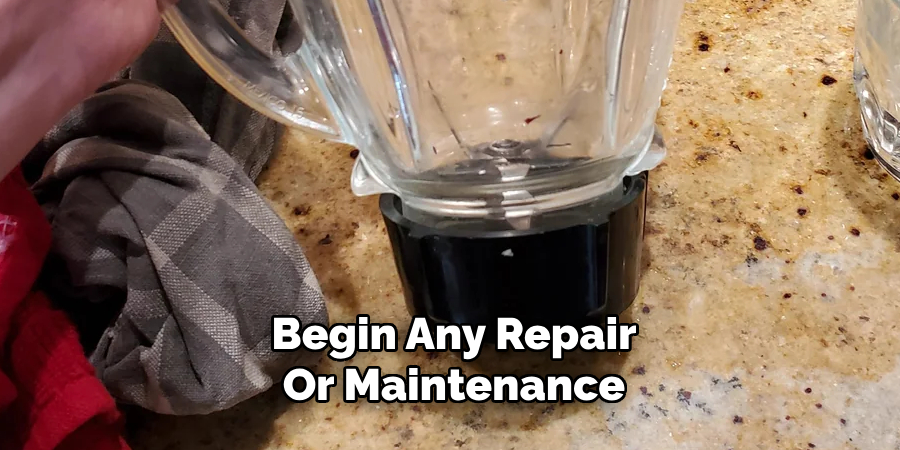
You can often fix a loose blender blade by unplugging the blender, inspecting the blade assembly and gasket, then tightening or replacing the faulty part.
For U.S. households, a loose blender blade can turn a simple smoothie or food-prep job into a messy leak or a safety concern. The right fix depends on where the looseness occurs: the blade assembly may be loose against the jar, the blade may be loose on its shaft, or the retaining hardware may have worn or shifted.
Start with the safest checks before taking anything apart. Unplug the blender, remove the jar or blending cup from the motor base, and handle the cutting blades carefully because they remain sharp even when the appliance is disconnected. Manufacturer instructions for several blender designs also emphasize checking that the gasket is correctly seated and that the blade assembly is firmly secured before operation.
A loose blender blade usually points to a problem with the blade assembly, its retaining hardware, the gasket, the threaded connection, or the internal bearing. The first task is to identify which part is actually moving rather than simply tightening the most accessible nut.
On many countertop blenders, the blade assembly connects to the bottom of the jar with a threaded base, collar, or retaining ring. On personal blenders, the blade assembly may screw directly onto a blending cup. Some designs also contain a separate shaft, bearing, seal, and retaining nut inside the blade assembly.
If the entire blade assembly moves relative to the jar or cup, the connection may simply be loose. If the metal blade itself moves independently of the blade housing or shaft, tightening the jar connection will not solve the underlying problem.
Source: hometechbuddy.com
Loose blade assembly
The complete blade base can move or rotate relative to the jar or blending cup. This can cause leaks, vibration, or poor operation.
Loose blade on the shaft
The cutting blade itself has play around the shaft. This usually requires inspection of the blade assembly and its retaining hardware rather than simply tightening the jar.
Damaged gasket
A worn, cracked, flattened, or displaced gasket can allow liquid to leak around the blade assembly even when the assembly appears secure.
Worn threads
Stripped or deformed threads can prevent the blade assembly from staying securely attached. Continued use can make the problem worse.
Bearing or blade assembly failure
A blade that wobbles, grinds, or fails to rotate smoothly may have an internal bearing or assembly problem that tightening alone cannot correct.
What You Need Before Fixing a Loose Blender Blade
You usually need only a few basic items, but the exact tools depend on the blender design. Check the owner’s manual before using pliers, a wrench, or any specialized blade-removal tool because some assemblies use model-specific retainers.
Work on a clean, dry, stable surface. A folded towel can help keep the jar from sliding while you inspect the underside. For models that require handling an exposed blade, use an appropriate cut-resistant glove or another method recommended by the manufacturer.
Source: www.youtube.com > Pater Practicus
Owner’s manual
Use it to confirm how the blade assembly is removed, which direction the retainer turns, and whether the assembly is designed to be serviced.
Clean towel
Place the jar or cup on a stable surface and use the towel for grip without placing your fingers directly against the cutting edges.
Appropriate wrench or tool
Use a supplied blade-removal tool or the tool specified for your model instead of forcing a retaining nut with an unsuitable tool.
Replacement gasket if needed
If the existing gasket is cracked, flattened, hardened, damaged, or missing, use the correct replacement for the blender model.
How to Fix a Loose Blender Blade Step by Step
The safest general approach is to work from the outside in: disconnect the appliance, identify the moving part, inspect the seal and threads, tighten only the appropriate connection, and test for leaks and abnormal movement before normal use.
Because blender construction varies, these steps are a general troubleshooting sequence rather than a universal disassembly procedure. If your owner’s manual gives a different removal or tightening method, follow the model-specific instructions.
Source: www.youtube.com
Step 1: Unplug the blender
Disconnect the blender from the electrical outlet before touching the jar, cup, blade assembly, or drive area. Never attempt to tighten a blade while the blender is connected to power.
Step 2: Remove the jar or cup
Take the blending container away from the motor base and empty it completely. Keep the motor base separate from the repair area.
Step 3: Identify what is loose
Gently check whether the entire blade assembly moves against the container or whether the individual cutting blade moves relative to its shaft or housing. Do not force the blade.
Step 4: Inspect the gasket
Look for a rubber or silicone gasket around the blade assembly. It should be present, correctly positioned, and free from obvious cracks, flattening, or damage.
Step 5: Check the retaining connection
If the blade assembly is designed to be removed, inspect the collar, retaining nut, or threaded connection. Use the manufacturer’s specified direction and tool because thread designs vary.
Step 6: Tighten the correct part
Secure the blade assembly or retaining hardware only as instructed for the model. Do not overtighten plastic threads or force a nut that will not turn normally.
Step 7: Reassemble the gasket and blade assembly
Make sure the gasket sits flat and the blade assembly is correctly seated. A displaced gasket can prevent proper sealing even when the retaining connection feels tight.
Step 8: Check for movement
Before reconnecting power, inspect the assembled container and make sure the blade assembly is secure. The cutting blade should not have excessive side-to-side movement.
Step 9: Test for leaks
If the model permits a simple water check, add a small amount of water and inspect the blade area for leakage before returning to normal blending.
Step 10: Test the blender carefully
If the assembly is secure and there are no leaks or visible defects, perform a brief test according to the owner’s manual. Stop immediately if you hear grinding, see unusual wobbling, or notice leakage.
How to Tighten a Loose Blade Assembly
If the complete blade assembly is loose where it connects to the jar or cup, remove the container from the motor base and secure the assembly according to the blender’s design. Some models use a screw-on blade base, while others use a retaining ring or nut underneath the jar.
Do not assume that every blender uses the same turning direction. Some designs use different thread arrangements, and manufacturer instructions take priority over a generic clockwise or counterclockwise rule.
Stop if the threads slip
If the connection will not tighten or the threads visibly skip, strip, crack, or deform, replace the damaged part rather than forcing it.
Keep the gasket correctly positioned
The blade assembly may feel secure but still leak if the gasket is missing, twisted, or seated incorrectly.
What If the Blade Itself Wobbles?
A blade that wobbles independently of the jar connection is a different problem from a loose blade assembly. The internal shaft, retaining hardware, bearing, or complete blade assembly may be worn or damaged.
Do not solve this type of wobble by repeatedly tightening the jar or cup. If the blade remains loose after the assembly connection is secure, replace the appropriate serviceable blade assembly or have the appliance repaired according to the manufacturer’s instructions.
Wobble with grinding
Grinding or rough rotation can indicate a mechanical problem inside the blade assembly and is a reason to stop using the blender.
Visible cracks
Cracks in the blade housing, jar, retaining components, or other structural parts are not a normal tightening problem. Replace the damaged component before use.
How to Tell Whether the Gasket Is the Real Problem
A blender can appear to have a loose blade when the actual problem is a failed or incorrectly seated gasket. The gasket creates the seal between the blade assembly and the container, so a damaged seal can produce leaking even when the assembly is properly secured.
Remove and inspect the gasket only if the blender design allows it and the owner’s instructions support removal. Look for cracks, cuts, flattening, hardening, distortion, or a gasket that has slipped out of its intended groove.
Source: storage.googleapis.com
Leak immediately after assembly
A leak that appears around the blade base can point to an incorrectly seated or damaged gasket rather than a loose blade.
Gasket no longer lies flat
A gasket that is folded, twisted, or partly outside its groove may not seal correctly.
Gasket is visibly damaged
Replace a cracked, torn, hardened, or badly flattened gasket with the correct part for the blender.
Gasket looks normal but leaking continues
Inspect the container and blade assembly for cracks, damaged threads, or other defects rather than repeatedly tightening the assembly.
Loose Blender Blade Symptoms and Likely Causes
The symptom can help narrow the repair, but it cannot identify the failed part with certainty without inspecting the specific blender. Use the table as a troubleshooting guide, then confirm the assembly against the manufacturer’s instructions.
Source: fixitwired.com
Troubleshooting Table
A blade that is loose, noisy, or leaking should not automatically be treated as a simple loose-nut problem. The location of the movement matters.
Blade assembly moves against jar
Possible loose retaining connection, damaged threads, or incorrectly seated assembly. Inspect and secure the connection according to the model instructions.
Individual blade wobbles on shaft
Possible internal blade assembly, shaft, retaining hardware, or bearing problem. Tightening the jar connection may not correct it.
Liquid leaks from blade base
Possible loose assembly, displaced gasket, damaged gasket, cracked container, or failed blade assembly.
Grinding or rough blade rotation
Possible damaged bearing, shaft, blade, or internal assembly. Stop using the blender until the cause is identified.
Assembly will not stay tight
Possible stripped or deformed threads, damaged retainer, or worn mating parts. Replacement may be required.
Blade will not rotate normally
A mechanical obstruction, damaged drive component, or failed blade assembly may be involved. Do not operate the blender until the problem is resolved.
When You Should Replace the Blender Blade Assembly
Replacement is usually the better option when the blade assembly itself is damaged, the blade remains loose after the approved retaining hardware is secured, the threads are stripped, or the internal bearing no longer allows smooth rotation.
A repair is also inappropriate when the jar or blade housing is cracked. A cracked component can compromise the connection and sealing surfaces, so continued tightening does not restore the original condition.
Source: YouTube > Rb Awsum
Replace it if the blade is cracked or bent
A damaged cutting blade should not be put back into service.
Replace it if the shaft has excessive play
Persistent movement at the shaft can indicate internal wear that a simple external adjustment cannot correct.
Replace it if threads are stripped
A retaining connection that cannot hold securely should not be forced into service.
Replace a damaged gasket
A gasket that is cracked, torn, hardened, or permanently distorted should be replaced with a compatible part.
Replace cracked structural parts
Do not operate a blender with a cracked jar, blade housing, collar, or other component that carries the blade assembly.
When Professional or Manufacturer Service Makes More Sense
Use manufacturer service or a qualified appliance repair professional when the blade assembly is not intended to be user-serviceable, the repair requires internal motor or bearing work, or you cannot determine which component is damaged.
This is especially appropriate when the blender is still under warranty. Disassembling a sealed or non-serviceable assembly can create additional damage and may affect warranty coverage depending on the manufacturer’s terms.
Sealed assembly
If the manufacturer does not provide a user-service procedure for the blade assembly, avoid forcing it apart.
Electrical or motor symptoms
If the loose-blade problem is accompanied by electrical smells, sparks, damaged wiring, or motor abnormalities, stop using the appliance and seek appropriate service.
Common Mistakes to Avoid
Most avoidable problems happen when users treat every blender as though its blade assembly uses the same construction. The safest repair is the one that matches the exact model and does not force damaged parts back into service.
Source: storage.googleapis.com
Do not work with the blender plugged in
Disconnect electrical power before handling the blade or removing the jar.
Do not grab sharp blades with bare fingers
Use the handling method recommended by the manufacturer and keep fingers away from cutting edges.
Do not overtighten plastic parts
Excessive force can damage threads, collars, seals, or the container.
Do not ignore a damaged gasket
A tight assembly does not compensate for a gasket that cannot create a proper seal.
Do not operate with a wobbling blade
Persistent blade movement can indicate internal mechanical damage and should be resolved before use.
Do not assume the turning direction
Blade retainers and assemblies differ by model. Follow the specific instructions rather than applying a universal direction.
Do not keep tightening a stripped connection
If threads no longer hold securely, the damaged component should be replaced.
Frequently Asked Questions
Q
Can I tighten a loose blender blade without taking the blender apart?
Sometimes. If the blade assembly simply screws onto the blending cup or jar and the manufacturer’s instructions allow user tightening, you may be able to secure it without opening the blade assembly. If the individual blade is loose on its shaft, however, the assembly may need inspection or replacement.
Q
Why is my blender blade loose and leaking?
A loose retaining connection can allow the blade assembly to move and leak, but a damaged or incorrectly seated gasket can cause the same symptom. Check both the mechanical connection and the gasket before assuming the blade itself is defective.
Q
Should a blender blade have a little movement?
The cutting blade should not have excessive wobble or side-to-side play. The exact amount of normal movement depends on the blender design, so compare the assembly with the manufacturer’s instructions. Grinding, significant wobbling, or abnormal looseness is a reason to stop using the blender.
Q
Can I use a blender if the blade is loose?
It is safer not to use it until you determine why it is loose. A loose blade assembly can leak, while a loose blade on its shaft can indicate mechanical damage. Secure or replace the affected component before normal blending.
Q
What if tightening the blender blade does not fix the problem?
Inspect the gasket, threads, blade shaft, bearing area, retaining hardware, and container for damage. If the blade still wobbles, the threads will not hold, the housing is cracked, or the assembly is not designed to be serviced, replace the appropriate part or use manufacturer or qualified repair service.
✦ Wrapping Up
Conclusion
Fixing a loose blender blade starts with identifying exactly what is moving. A loose blade assembly may need proper tightening, while a loose blade on its shaft can indicate worn or damaged internal components. The gasket also deserves attention because a damaged or displaced seal can cause leaks even when the assembly is tight.
For a safe repair, unplug the blender, remove the container from the motor base, inspect the blade assembly and gasket, and follow the specific instructions for your model. If the blade remains unstable, the threads are damaged, the assembly is cracked, or unusual grinding continues, replacement is safer than repeated tightening.
💡 Key Takeaway
Unplug the blender first, identify whether the assembly or individual blade is loose, inspect the gasket and threads, tighten only according to the model instructions, and replace damaged components before using the blender again.