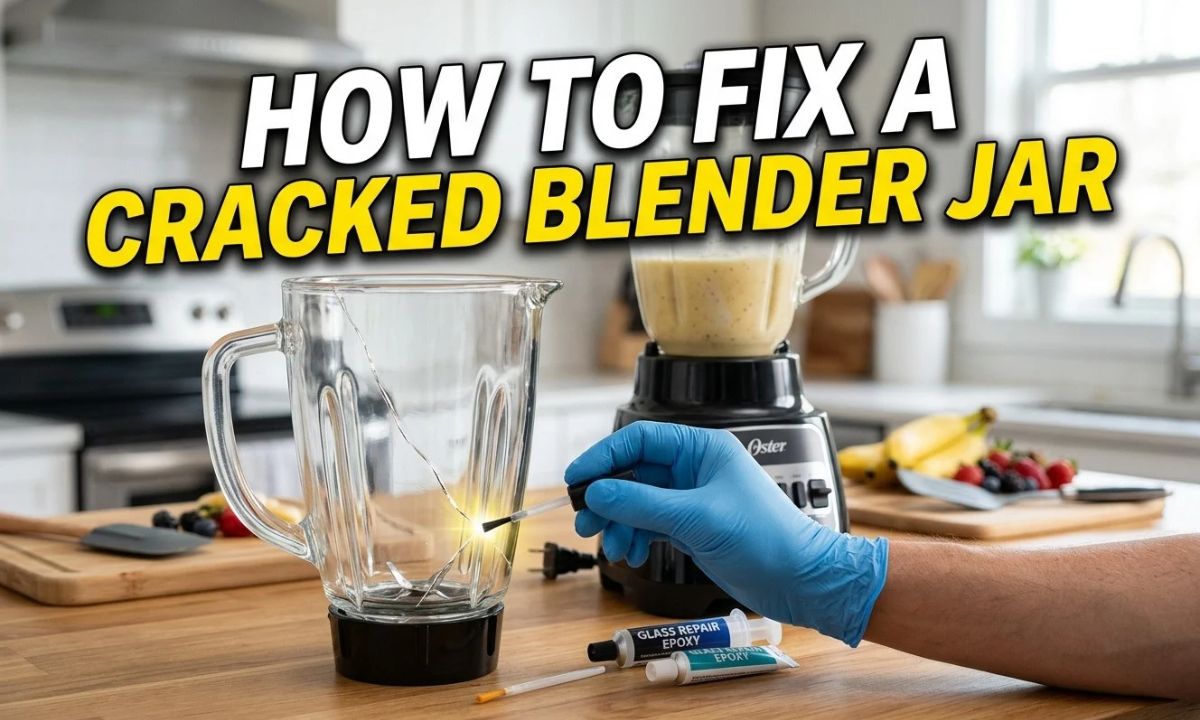
A cracked blender jar is usually safest to replace, especially if the crack reaches the base, blade assembly, or liquid-holding area.
In American kitchens, blenders help prepare smoothies, soups, sauces, and protein shakes. When a blender jar develops a crack, even a small leak can make meal preparation messy and raise safety concerns. Before using the blender again, identify whether the problem comes from the jar itself, a loose blade assembly, or a worn rubber gasket.
The right fix depends on where the damage appears and what the jar is made of. A damaged seal may be replaceable, but a cracked glass or plastic container should not be assumed safe simply because an adhesive stops the leak. Food contact, heat, pressure from blending, and fast-moving blades all matter when deciding whether to repair or replace a damaged part.
A cracked blender jar generally should be replaced rather than patched. A crack can spread when the motor spins the blades, ingredients strike the container, or the jar warms during use. An adhesive patch might hide the leak without restoring the container’s original strength.
There is an important difference between repairing a leaking seal and repairing a cracked container. A worn gasket, loose blade assembly, or damaged removable seal may be replaceable. A split or fractured jar is a structural problem that usually calls for a replacement jar or pitcher.
The safest choice is to consult the manufacturer’s instructions for your blender model. If the manufacturer does not offer an approved repair for the damaged container, replace the jar instead of relying on a homemade patch.
Source: www.youtube.com > Rink
Replace a cracked container
A visible crack in the jar wall or bottom can weaken the container and allow liquid to escape during blending.
Repair a faulty seal when appropriate
If the jar itself is intact and the leak comes from a worn gasket or incorrectly fitted removable component, an approved replacement part may solve the problem.
Stop using shattered or chipped glass
Glass fragments can contaminate ingredients, and damaged glass may fail further during handling or operation.
Why a Cracked Jar Can Be Dangerous
Blender jars experience repeated mechanical forces as the blades move ingredients around the container. A damaged area may be less able to withstand those forces. A leak can also send liquid toward the motor base, creating a risk of electrical damage depending on the appliance design.
Cracked glass presents an additional risk because fragments may break away. A plastic jar can also split, deform, or release small pieces if the damage worsens. Neither material should be treated as safe merely because a crack looks small.
Leakage
Liquid may escape onto the counter or motor base.
Further cracking
Vibration, impact, heat, and repeated use may worsen existing damage.
Food contamination
Loose plastic or glass fragments may enter the ingredients.
How to Identify the Source of a Blender Jar Leak
Before buying a replacement, determine whether the jar is cracked or the leak originates from a removable seal. A leak near the bottom does not automatically mean the container itself is broken.
Unplug the blender before inspecting it. Empty the jar, remove it from the motor base, and dry the outside completely. Examine the container under good lighting, paying close attention to the bottom, blade housing, handle attachment, and threaded areas. Do not run the blender to test a suspected crack.
Source: juicerhunter.com
Look for visible damage
Check for hairline fractures, chips, splits, cloudy stress marks, or cracks extending from the bottom or handle.
Inspect the gasket
Look for a flattened, torn, brittle, missing, or incorrectly seated rubber seal, if your model uses a removable gasket.
Check the blade assembly
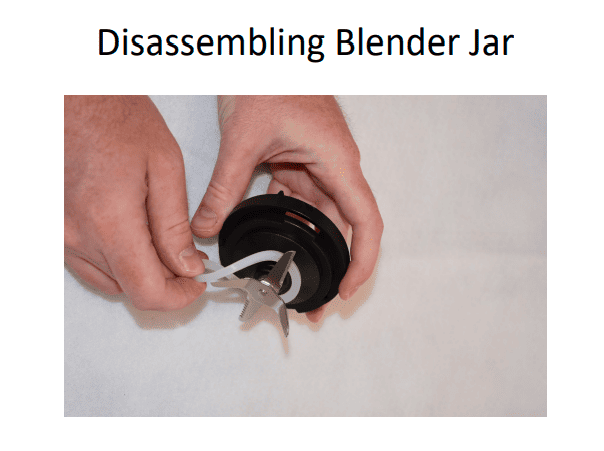
Look for a loose assembly, damaged threads, or a visibly worn seal. Do not handle sharp blades carelessly or disassemble a sealed unit against the manufacturer’s instructions.
Check the mounting area
Inspect the jar’s coupling and base for broken tabs, worn threads, or damage that could prevent the container from seating correctly.
Common Symptoms and Possible Causes
Use the location and appearance of the problem to guide your next step. These clues can help distinguish a damaged container from a replaceable sealing component, but they do not prove that a part is safe to reuse.
Liquid leaks through the jar wall
A visible crack or split is the likely cause. Stop using the jar and arrange a compatible replacement.
Liquid leaks around the bottom
Possible causes include a damaged bottom seam, worn gasket, loose blade assembly, or cracked jar base. Inspect the container and follow the model-specific repair instructions.
Liquid leaks after the jar is assembled
The gasket may be misaligned, missing, or worn, or the threads may be damaged. Replace approved service parts if the container itself is undamaged.
The jar does not sit firmly on the motor base
The mounting tabs, coupling, or locking mechanism may be damaged. Do not operate the blender until the problem is corrected.
How to Fix a Cracked Blender Jar Safely
The safest way to address a cracked blender jar is to stop using it, confirm the damage, and replace the jar or affected approved component. A homemade adhesive patch is not a dependable substitute for the original container.
Follow these steps to choose the appropriate repair without exposing yourself to broken glass, sharp blades, or electrical hazards.
Source: foodsfate.com
Step 1: Disconnect the blender
Unplug the appliance before removing the jar or inspecting the blade assembly. If liquid has entered the motor base, leave the blender unplugged and consult the manufacturer’s service guidance.
Step 2: Empty and inspect the jar
Remove the ingredients and inspect the container in good light. Avoid pressing on a crack, bending a damaged plastic wall, or handling chipped glass.
Step 3: Identify the damaged component
Determine whether the container wall, bottom, blade assembly, gasket, threads, or mounting area is damaged. If the source is unclear, consult the manufacturer’s support service.
Step 4: Find the correct replacement
Use the blender’s brand and exact model number to locate a compatible jar, gasket, blade assembly, or other approved service part.
Step 5: Install the replacement according to the manual
Follow the specified assembly sequence and instructions. Do not overtighten threaded parts or reuse a damaged seal.
Step 6: Check the assembly before use
Confirm that all components are seated correctly and that the replacement is undamaged. If anything is loose, misaligned, or uncertain, do not operate the blender.
What About a Small Hairline Crack?
A hairline crack is not necessarily less serious than a larger visible split. Its depth, location, and the jar’s material can affect how it behaves under load, and the damage may extend farther than it appears on the surface.
Do not fill the crack with glue or continue blending to see whether it holds. Replace the container or obtain a manufacturer-approved repair if one is available for that exact model. A crack in the liquid-holding wall or base should be treated as a reason to stop using the jar.
Do not test it with food
Blending ingredients creates forces that can worsen damage, while a leaking container may spill into the motor base.
Do not rely on appearance alone
A narrow crack can still compromise the container, even when it does not leak while standing still.
Can You Use Epoxy, Superglue, or Silicone Sealant?
Do not use ordinary household glue, superglue, epoxy, or silicone sealant to patch a blender jar that holds food. A product marketed as waterproof or strong is not automatically suitable for food contact, repeated washing, warm ingredients, or the mechanical forces produced during blending.
Even when an adhesive is described as food-contact suitable after curing, that description alone does not establish that it is appropriate for repairing a load-bearing blender container. Suitability depends on the exact formulation, conditions of use, and appliance manufacturer’s instructions. A patch can also conceal damage without restoring the jar’s original strength.
Use only a repair method explicitly approved by the blender manufacturer for the exact component and application. If no such repair is documented, replace the cracked jar.
Superglue
Ordinary consumer superglue is not a dependable structural repair for a blender jar exposed to repeated mechanical stress.
Epoxy
Water resistance or a hard cure does not prove suitability for the jar’s food-contact and operating conditions.
Silicone sealant
A flexible sealant may stop a stationary leak temporarily, but it does not restore the strength of a cracked container.
How to Fix a Blender Jar That Leaks From the Bottom
If the jar is intact and liquid leaks from the bottom, inspect the seal and blade assembly before deciding that the entire jar needs replacement. Some blender models use removable blade assemblies and replaceable gaskets, while others use sealed or integrated components.
Keep the blender unplugged throughout inspection. Follow the user manual for disassembly because some assemblies contain sharp blades, and incorrect reassembly can cause leaks or damage.
Source: www.youtube.com > Press To Cook
Check the gasket position
If the manual allows gasket removal, verify that the seal is present, clean, undamaged, and correctly seated.
Replace a worn gasket
Use a manufacturer-approved gasket that matches the exact model. A similar-looking seal may have the wrong dimensions or material.
Inspect the threads
Look for cross-threading, cracks, or worn plastic around the blade assembly. Damaged threads may prevent a secure seal.
Check the blade assembly
If the assembly or its seal is damaged, replace the approved component or seek service rather than improvising a repair.
How to Tell Whether the Gasket Needs Replacement
A gasket is a flexible sealing ring that helps prevent liquid from escaping between assembled parts. A worn or displaced gasket may allow leaks even when the jar has no visible crack.
Look for splits, deformation, hardened rubber, missing sections, or a seal that will not stay in its intended position. Clean and reinstall a reusable gasket only as directed by the manufacturer. If it is damaged, replace it with the correct part.
The seal is torn or flattened
Replace it with a compatible manufacturer-approved part.
The gasket is intact but displaced
Reinstall it according to the manual if the design permits removal.
The jar or blade housing is cracked
A gasket replacement will not repair structural damage. Replace the damaged component.
How to Choose the Correct Replacement Blender Jar
Choose a replacement jar using the exact blender model number, not appearance alone. Two jars may look alike but differ in blade compatibility, coupling design, capacity, lid fit, or locking mechanism.
Find the model information on the appliance label, usually on the underside or back of the motor base, or in the owner’s manual. Search the manufacturer’s parts catalog or contact customer support to confirm the compatible container and any required blade assembly or lid.
Before ordering, compare the replacement’s listed compatibility with your model. If the original jar is discontinued, ask the manufacturer whether a documented substitute exists. Avoid forcing an incompatible jar onto the motor base.
Source: YouTube
Exact model compatibility
Confirm that the replacement is approved for your specific blender model or model family.
Jar material
Check whether the original design uses glass, plastic, or another material and select an approved compatible option.
Blade and coupling design
Verify whether the replacement includes the blade assembly and whether the coupling matches the motor base.
Lid and capacity
Check the lid fit, pouring spout, capacity, and any model-specific accessories.
Parts and warranty support
Check whether the manufacturer offers replacement parts or warranty service for the damaged component.
Should You Replace the Jar or the Entire Blender?
Replacing only the jar is often the more practical option when the motor base works correctly and a compatible replacement is available. Replacing the entire blender may make more sense when the correct jar is discontinued, replacement parts are costly, or the motor base has also been damaged.
Compare the cost of the compatible jar and any required blade assembly with the cost of a suitable replacement blender. Include shipping, any needed accessories, and warranty coverage in that comparison. Do not keep using a damaged jar simply because a replacement costs more than expected.
Replace the jar
Consider this when the motor base is undamaged and a compatible replacement is readily available.
Seek authorized service
Consider service when the damage involves an integrated blade assembly, unusual mounting system, or liquid exposure to the motor base.
Replace the whole blender
Consider replacement when compatible parts are unavailable or repairing the appliance is not economical.
What to Do After Replacing a Blender Jar or Seal
Before returning a blender to normal use, confirm that the replacement parts are correctly installed and that the appliance shows no signs of damage. A new jar or gasket will not resolve an electrical problem or a damaged motor-base coupling.
Follow the manufacturer’s setup and cleaning instructions. Do not improvise a high-speed test or use the blender if the assembly is loose, a crack remains, or liquid may have entered the motor base.
Source: storage.googleapis.com
Check the assembly
Confirm that the jar, blade assembly, gasket, lid, and mounting components are installed as specified.
Inspect for visible damage
Make sure the replacement has no cracks, chips, damaged threads, or defective seals.
Follow the manual
Use only the initial inspection or operation procedure specified by the manufacturer. Do not operate the blender if any component appears loose or defective.
Watch for warning signs
Stop immediately if you notice leakage, unusual vibration, burning smells, sparks, or abnormal noises.
How to Prevent Future Blender Jar Damage
Careful handling and correct assembly can help reduce avoidable damage. Follow the blender manufacturer’s guidance for ingredient preparation, hot liquids, cleaning, and storage because recommendations differ by model and container material.
Avoid sudden impacts
Do not drop the jar or strike it against the sink or countertop.
Use the correct ingredients and settings
Follow the manual for ice, frozen foods, hot liquids, and other demanding blending tasks.
Assemble parts correctly
Avoid cross-threading the blade assembly or overtightening components.
Clean and store carefully
Use approved cleaning methods and store the jar where it cannot fall or collide with heavy cookware.
Inspect the jar regularly
Look for cracks, chips, loose components, and deteriorating seals before use.
Common Mistakes to Avoid When Repairing a Blender Jar
The biggest mistake is treating a cracked blender jar as an ordinary household container that only needs waterproofing. A blender jar must withstand mechanical forces, and a surface patch cannot be assumed to restore its original strength.
Avoid these shortcuts when diagnosing or repairing the problem.
Source: dreamstime.com
Continuing to use a cracked jar
A crack may worsen during blending, even if the jar does not leak while standing still.
Using household adhesives
Ordinary adhesives may be unsuitable for food contact, temperature changes, cleaning, or repeated mechanical stress.
Testing the repair at high speed
Do not operate a damaged container to check whether a patch holds.
Assuming every bottom leak is a crack
A damaged or displaced gasket can cause leakage, so inspect the seal and blade assembly when the jar itself is intact.
Buying a jar based on appearance
A replacement that looks similar may not fit the motor base or seal correctly.
Ignoring damage to the motor base
If liquid has entered the electrical components, do not reconnect the appliance until it has been assessed according to the manufacturer’s service guidance.
Frequently Asked Questions
Q
Can I use a blender with a small crack in the jar?
No. Stop using a jar with a visible crack in its liquid-holding wall or base. Even a small fracture can worsen under vibration and mechanical stress. Replace the jar or follow a repair method explicitly approved by the manufacturer for that exact model.
Q
Can superglue fix a cracked blender jar?
Ordinary superglue is not a dependable repair for a cracked blender jar. Its suitability for food contact and its ability to withstand the appliance’s operating conditions cannot be assumed. A replacement jar is generally the safer option.
Q
Can I repair a plastic blender jar with epoxy?
Do not assume that epoxy is safe or strong enough for this application just because it is waterproof or hard after curing. A blender jar must withstand food contact, cleaning, and mechanical stress. Unless the manufacturer explicitly approves a repair method for the exact container, replace the cracked jar.
Q
Why is my blender leaking from the bottom?
Common causes include a worn or misplaced gasket, a loose blade assembly, damaged threads, or a crack in the jar’s bottom. Unplug the blender and inspect the parts according to the manual. If the container is cracked, replace it; if an approved replaceable seal is damaged, install the correct replacement.
Q
Can a glass blender jar be repaired after it cracks?
A cracked glass blender jar should generally be replaced rather than glued. Glass can fracture further, and small fragments may contaminate food. Stop using the jar, handle broken pieces carefully, and check the manufacturer’s parts catalog for a compatible replacement.
Q
Is it cheaper to replace a blender jar or buy a new blender?
Replacing the jar is often more economical when a compatible part is available and the motor base works correctly. Compare the jar and any required blade assembly costs with the price of a replacement blender. If the motor base is damaged or compatible parts are unavailable, replacing the entire appliance may be more practical.
Q
How can I find the right replacement jar for my blender?
Find the exact model number on the motor base or in the owner’s manual. Check the manufacturer’s parts catalog or contact customer support to confirm compatibility. Verify the jar design, capacity, blade assembly, lid, and mounting mechanism before ordering.
✦ Wrapping Up
Conclusion
Fixing a cracked blender jar safely starts with identifying the damaged component. A worn gasket or replaceable seal may be repairable, but a crack in the container itself should generally lead to replacement rather than a homemade adhesive patch.
Before buying parts, check the blender’s exact model number and consult the manufacturer’s instructions. If the jar is broken, the blade assembly is damaged, or liquid may have entered the motor base, keep the appliance unplugged until the problem has been addressed.
💡 Key Takeaway
Unplug the blender, inspect the jar and seals, and replace any cracked container with a manufacturer-approved compatible part before blending again.