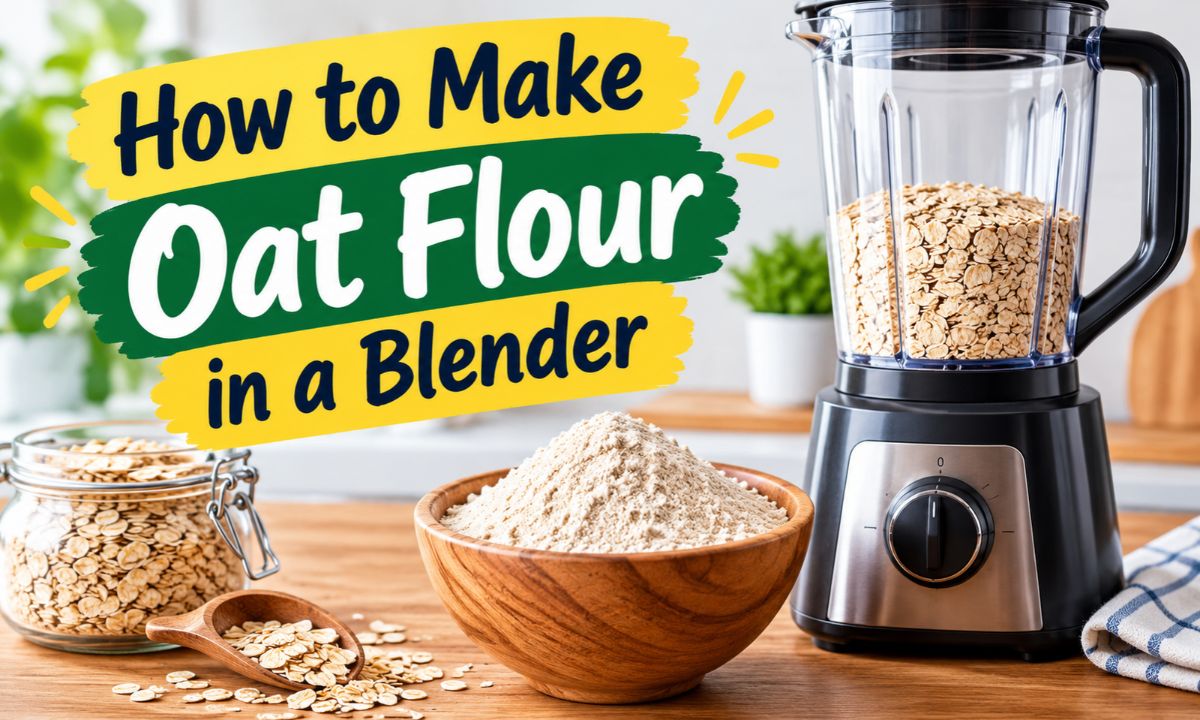
Add plain rolled oats to a clean, dry blender and blend until they form a fine, powdery flour, usually within 30 to 60 seconds.
In American kitchens, oat flour is a handy pantry staple for pancakes, muffins, cookies, quick breads, and many other homemade treats. You do not need to buy a special bag at the grocery store if you already have plain oats and a blender. With a few simple steps, you can turn whole oats into flour when a recipe calls for it.
The basic method is easy, but a few details can affect the result. Dry oats grind more easily than damp oats, small batches help the blades work well, and short pauses can keep the flour from getting too warm. The type of oats you choose also matters, especially when you want a fine texture for baking.
This guide explains how to make oat flour in a blender, how to tell when it is ready, how to store it, and how to use it in recipes. It also covers common problems, including coarse flour, clumps, and baking results that differ from those made with wheat flour. One key point is that homemade oat flour does not behave exactly like all-purpose flour, so some recipes may need small changes.
Oat flour is simply oats ground into a fine powder. It has a mild, slightly nutty taste and can add a soft texture to many baked foods. You can buy it in grocery stores, but you can also make it at home with a blender.
Unlike wheat flour, oat flour contains no gluten-forming wheat proteins. That changes how it behaves in dough and batter. It works well in many recipes, but it may not hold its shape or rise in the same way as flour made from wheat.
Homemade oat flour is useful when you need a small amount for a recipe. It also lets you choose the oats you use and grind only what you need. The main trade-off is that the final texture depends on your blender, batch size, and blending time.
Rolled oats
These flat oats are a practical choice for homemade flour. They are easy to measure and usually grind well in a standard blender.
Quick oats
These can also work well. They are smaller and thinner than many rolled oats, so they may grind quickly.
Steel-cut oats
These are small, hard pieces of oat groats. A standard blender may struggle to grind them evenly, so rolled or quick oats are usually easier for this task.
Can You Use Any Blender?
Most household blenders can grind oats if the jar, blade design, and motor are suited to dry ingredients. A high-powered blender may produce a fine texture faster, but you do not need a premium model just to make a small batch.
Check the manufacturer’s instructions before grinding dry foods. Some blender models are not designed for dry grinding, and a separate dry-grain container may be recommended. Never force a blender to run if the blades are stuck or the motor sounds strained.
Standard countertop blender
A useful option for small or medium batches when the oats can move freely around the blades.
Personal blender
It may work for small batches if the manufacturer permits dry grinding. Avoid filling a narrow cup so tightly that the oats cannot circulate.
High-powered blender
It can make fine flour quickly, although the same basic method still applies. Follow the model’s instructions for dry ingredients.
What You Need Before You Start
You only need a few basic items to make oat flour. Gather your oats, blender, measuring cup, and a clean container for the finished flour. A fine-mesh sieve is optional, but it helps when a recipe calls for a soft, even texture.
Start with plain oats that have no added sugar, salt, flavoring, or dried fruit. These extras are not needed for flour and can change how the mixture tastes or grinds. Check the package if you are making flour for someone with a food allergy or a strict dietary need.
Make sure the blender jar and blades are clean and completely dry. Moisture can make the oat particles stick together and may lead to clumps. A dry jar also makes it easier to pour out the finished flour.
Plain oats
Use rolled oats or quick oats. Start with a small amount until you know how your blender handles them.
A dry blender
Check that the jar, lid, and blade area are free of water and food residue.
A measuring cup or kitchen scale
Measure the oats before grinding so you can plan how much flour to make for your recipe.
A clean storage container
Choose a dry, airtight jar or food-safe container for any flour you do not use right away.
A sieve
Use it to separate coarse oat bits from the fine flour if you want a smoother result.
Should You Wash the Oats First?
No. Packaged oats intended for cooking or baking do not normally need to be washed before grinding. Washing adds water, which makes the oats harder to grind into a dry powder and may affect storage.
If the oats look damp or have been exposed to moisture, do not put them straight into the blender. Use dry oats in good condition instead. If you suspect that the oats have spoiled or been contaminated, discard them rather than trying to make them usable by grinding.
Check the package
Look for plain oats with no unexpected moisture, insects, or signs of damage.
Keep equipment dry
Dry the blender jar fully after washing it before adding the oats.
How to Make Oat Flour in a Blender Step by Step
The easiest method is to grind a manageable amount of oats until they look like flour. For a first batch, start with about 1 cup of rolled oats. This amount is a practical starting point, not a fixed rule, because blender jars differ in size and shape.
Keep the lid in place while blending, and use the speed or pulse setting recommended by the manufacturer. If the oats stop moving, switch the blender off before checking the mixture. Never put a spoon or your fingers into a running blender jar.
Step 1: Measure the oats
Add about 1 cup of plain rolled oats to a clean, dry blender jar. Use less if the jar is small or the manufacturer recommends a lower fill level.
Step 2: Secure the lid
Fit the lid firmly before switching on the blender. This keeps the fine oat dust inside the jar.
Step 3: Start blending
Blend at a suitable speed for about 20 to 30 seconds, or use short pulses if your blender works better that way.
Step 4: Check the texture
Turn off the blender and wait for the oat dust to settle before opening the lid. Check whether the flour looks fine or still contains visible flakes.
Step 5: Blend again if needed
If large pieces remain, secure the lid and blend for another 10 to 20 seconds. Repeat as needed without making the motor work beyond its limits.
Step 6: Sift the flour
For a finer result, pass the ground oats through a fine-mesh sieve. Return any coarse pieces to the blender and grind them again.
Step 7: Transfer and store
Pour the flour into a clean, dry container. Use it in your recipe or seal it for later use.
How Do You Know When the Flour Is Ready?
Finished oat flour should look like a loose, dry powder. It may feel a little grainier than some store-bought flour, but it should not contain many large flakes if you need a fine texture.
Rub a small pinch between clean fingers to check for coarse bits. Do this only after the blender is switched off and the flour has been removed from the jar. If you can still see many oat pieces, grind the mixture again.
Fine and powdery
The flour is ready for most recipes that allow oat flour’s natural texture.
A few coarse pieces
Sift the flour and regrind the pieces left in the sieve.
Sticky or damp clumps
Check for moisture in the oats or blender jar. Do not seal damp flour for long-term storage.
How Much Oat Flour Does One Cup of Oats Make?
One cup of rolled oats usually makes roughly a cup of oat flour, although the exact volume can vary with the oat type, grind, and measuring method. Grinding breaks the oats into smaller pieces, but it does not remove their solid mass. The finished flour may settle more tightly in a measuring cup than whole oats do.
For the most consistent baking results, weigh the oats and flour when a recipe provides weights. Volume measurements can vary because one person may scoop flour firmly while another may spoon it into a cup. If the recipe gives only cups, use the same measuring method each time.
Small batch
Start with 1 cup of oats when you need enough flour for a modest recipe or want to test your blender.
Medium batch
Use 2 cups of oats if the blender jar allows enough space for the oats to circulate and the motor can handle the load.
Large batch
Grind several small batches rather than packing a full jar. This can help the oats move and produce a more even texture.
A Simple Batch Planning Example
Suppose a pancake recipe calls for 2 cups of oat flour. You can start by measuring 2 cups of rolled oats, then grind them and check the finished amount. If the flour comes up short after sifting, grind a little more oats to make up the difference.
This is a practical planning example, not an exact conversion for every blender or oat brand. If your recipe depends on precise proportions, use a kitchen scale and follow the recipe’s stated measurement method.
Measure before grinding
This gives you a useful starting estimate for the amount of flour you will need.
Check after sifting
Some coarse pieces may stay in the sieve, so the usable flour amount can be slightly lower.
Tips for Making Fine Oat Flour
The best way to get fine oat flour is to give the oats room to move, use a dry jar, and blend in short rounds. A blender that is too full may leave large pieces around the top while the oats near the blades turn into powder. Smaller batches often give more even results.
Do not assume that longer blending always gives a better result. If the flour is already fine, more blending adds little value and may warm the mixture. Follow the blender manufacturer’s guidance and pause if the motor gets hot or the machine sounds strained.
Use a manageable batch
The oats should be able to move toward the blades. Reduce the amount if the blender spins without grinding the oats.
Pulse when useful
Short bursts can help loosen oats that collect near the top. Turn off the machine before opening it to inspect the mixture.
Shake only when safe
If the manufacturer’s instructions allow it, switch the blender off and gently move the jar to redistribute the oats before blending again.
Sift for a smoother texture
A fine-mesh sieve helps separate powder from larger particles. Regrind the larger pieces if you want to use them.
Keep moisture away
Even a small amount of water can cause clumps. Dry the jar and keep steam away from the flour.
Why Is My Oat Flour Still Coarse?
Coarse flour often means the oats did not have enough room to move or the blender needs more time. The blade design also affects how evenly dry foods are ground. A small amount of coarse flour is not necessarily a problem if the recipe can handle a slightly hearty texture.
If the recipe needs a fine powder, stop the blender, let the dust settle, and inspect the flour. Reblend the coarse portion in a smaller batch. If the blender cannot grind the oats well, use a suitable dry-grinding attachment or another appliance designed for the task.
The flour has visible flakes
Blend again in short rounds and check the result between rounds.
The oats collect above the blades
Reduce the batch size and follow the manufacturer’s instructions for dry ingredients.
The motor strains
Stop the blender. Let it cool as directed by the manufacturer and use a smaller batch if the appliance permits.
How to Store Homemade Oat Flour
Store homemade oat flour in a clean, dry, airtight container. Keep it in a cool, dry cupboard away from the stove, direct sunlight, and sources of steam. Moisture and heat can shorten its useful life and affect its smell, taste, and texture.
Because homemade flour may retain more of the natural oils from the oats than a particular commercial product, its storage life can vary. The condition of the oats, the cleanliness of the equipment, and the storage temperature all matter. For the best quality, make a batch that you expect to use soon instead of grinding far more than you need.
For longer storage, you can refrigerate or freeze oat flour in a sealed, food-safe container. Protect it from moisture and strong odors. If you chill the flour, let the closed container reach room temperature before opening it so moisture from the air is less likely to form on the flour.
Room temperature
Use an airtight container and keep it in a cool, dry place. Check it before use if it has been stored for a while.
Refrigerator
A sealed container can help protect flour during longer storage, but avoid repeated exposure to damp air.
Freezer
Freeze flour in a well-sealed container or freezer-safe bag. Remove only what you need and reseal it promptly.
Label the container
Write the preparation date on the container so you can keep track of the batch.
How Can You Tell If Oat Flour Has Gone Bad?
Fresh oat flour should have a mild oat smell. Discard it if you notice a rancid, sour, musty, or otherwise unusual odor, visible mold, signs of insects, or evidence that water has entered the container.
Do not taste flour to decide whether it is safe. Raw flour and ground grains are not ready-to-eat foods unless they have been processed for that purpose. Cooking or baking is an important part of using ordinary oat flour safely.
Unusual smell
Discard flour that smells rancid, musty, or clearly different from fresh oats.
Visible mold or pests
Throw the flour away. Do not try to save it by sifting or blending.
Unexpected moisture
If damp flour has been stored and its condition is uncertain, discard it rather than risking spoilage.
How to Use Oat Flour in Recipes
Oat flour works well in many recipes that benefit from a mild flavor and a tender crumb. Try it in pancakes, muffins, cookies, quick breads, and some cakes. It can also thicken certain soups or sauces when cooked, although the amount and method depend on the recipe.
The main difference is structure. Wheat flour forms a gluten network when mixed with water, which helps many baked foods hold their shape. Oat flour does not create that same network, so a recipe made entirely with oat flour may be more tender, crumbly, or dense than one made with wheat flour.
For the most reliable result, begin with a recipe written for oat flour or one that gives clear instructions for replacing wheat flour. A recipe designed for almond flour, coconut flour, or another gluten-free flour may behave differently, so do not assume that all flour substitutes work the same way.
Pancakes
Oat flour can make soft pancakes with a mild oat taste. Letting the batter rest briefly may help the oats absorb liquid, but follow the recipe for the best balance.
Muffins
Oat flour can work well in moist muffin batters. Eggs or other binding ingredients may help the baked muffins hold together.
Cookies
It can add a soft texture and a mild, nutty flavor. The spread and final texture may change if you replace all the wheat flour.
Quick breads
Recipes built for oat flour are often easier to use than direct substitutions because their liquid and binding ingredients are already balanced.
Smoothies
A small amount of finely ground oats can add body. Use a recipe that includes enough liquid and blend the mixture well.
Can You Replace All-Purpose Flour With Oat Flour?
Sometimes, but not in every recipe at the same amount. Oat flour behaves differently from all-purpose flour because it lacks wheat gluten and absorbs liquid in its own way. A direct one-to-one swap by volume may lead to a batter that is too thick, too loose, or unable to hold its shape.
For pancakes or simple muffins, a substitution may work with some adjustment. For yeast bread, chewy pizza dough, or recipes that rely on a strong gluten structure, replacing all the wheat flour with oat flour is much less predictable. Choose a recipe designed for oat flour when the structure matters.
Check the recipe first
Use an oat-flour recipe when possible. It is more likely to provide the right balance of liquid, fat, and binding ingredients.
Watch the batter
Oat flour may absorb liquid as it rests. Follow the recipe’s rest time before deciding whether the mixture needs adjustment.
Expect a different crumb
Baked goods may be softer or more fragile than wheat-based versions. Let them cool as directed before removing them from the pan.
Is Homemade Oat Flour Gluten-Free?
Oats do not contain the same gluten proteins found in wheat, barley, and rye. However, oats can come into contact with these grains during growing, transport, or processing. A bag of ordinary oats is therefore not automatically suitable for someone who must avoid gluten.
If you are baking for someone with celiac disease or another medical need to avoid gluten, choose oats and oat products labeled gluten-free from a source that manages cross-contact. Also check every other ingredient and keep the blender, work surface, measuring tools, and storage containers free from crumbs or flour residues that may contain gluten.
Choose suitable oats
Look for a clear gluten-free label when gluten avoidance is required.
Prevent cross-contact
Use clean equipment and avoid sharing flour-covered utensils or storage containers.
Common Mistakes and How to Fix Them
Most problems with homemade oat flour come from moisture, an overloaded blender, or stopping before the oats are ground finely enough. The fix is usually simple, but the right response depends on what you see. Always switch off the blender before opening the lid or moving the mixture around.
Do not keep running the machine if it smells hot, makes an unusual noise, or struggles to turn. Stop and follow the manufacturer’s cooling and troubleshooting instructions. A small batch is better than forcing the appliance to grind more oats than it can handle.
Mistake: Filling the blender too much
Why it happens: The oats cannot circulate well, so the flour becomes uneven. Fix: Remove some oats and grind them in separate batches.
Mistake: Using a wet blender jar
Why it happens: Water causes oat particles to stick together. Fix: Stop and address the moisture issue. Do not store damp flour for later use.
Mistake: Expecting wheat-flour results
Why it happens: Oat flour does not form a gluten network. Fix: Use a suitable recipe or adjust the binding and liquid only when the recipe supports it.
Mistake: Blending for too long
Why it happens: The motor may warm up, even when the flour is already fine. Fix: Check between short blending rounds and stop when the texture is suitable.
Mistake: Storing flour in an open bowl
Why it happens: Air, moisture, and odors can affect quality. Fix: Transfer the flour to a clean, dry, airtight container.
Mistake: Using flavored oats
Why it happens: Added ingredients can change the taste and texture. Fix: Choose plain oats for a neutral flour.
Troubleshooting at a Glance
Use the symptoms below to decide what to change before starting another batch. Check the blender’s instructions first if the problem involves the motor, blade movement, or unusual heat.
Coarse flour after blending
Reduce the batch size, blend again in short rounds, and sift if a fine texture is needed.
Oats will not move toward the blades
Switch off the blender and remove some oats. Do not reach into the jar while the appliance is running.
Flour forms damp clumps
Check whether the oats or jar were wet. Use dry equipment and fresh oats for the next batch.
Blender gets hot or sounds strained
Stop the machine, let it cool as directed, and reduce the batch. If the issue continues, consult the manufacturer’s support guidance.
Frequently Asked Questions
Q
Can I make oat flour in a regular blender?
Yes, many regular countertop blenders can grind plain oats into flour. The result depends on the blender’s design, motor, blade setup, and the amount of oats you use. Check the owner’s manual to confirm that your model can handle dry ingredients.
Start with a small batch and blend in short rounds. If the blender struggles or the oats remain coarse, reduce the amount rather than forcing the machine to keep running.
Q
How long does it take to make oat flour?
A small batch may take about 30 to 60 seconds of total blending, although the exact time varies by blender and batch size. You may need extra time if the flour remains coarse.
Check the texture between rounds instead of relying only on a timer. Stop when the flour is fine enough for your recipe, and follow the blender manufacturer’s guidance for dry grinding.
Q
Do I need to toast oats before making oat flour?
No. Plain, dry oats can be ground directly into flour without toasting. This is the simplest method when you want a neutral oat flavor for pancakes, muffins, or cookies.
Toasting is optional and changes the flavor. If you toast oats, let them cool completely before grinding and make sure they are dry. Warm oats can release more aroma and may affect the texture during grinding.
Q
Can I use steel-cut oats to make oat flour?
You may be able to grind steel-cut oats in a blender designed for dry grinding, but they are harder and more compact than rolled oats. Some standard blenders may not grind them evenly.
Rolled oats or quick oats are usually the easier starting point. If you want to use steel-cut oats, check the appliance instructions and work in a small batch.
Q
Can I make oat flour without a blender?
Yes. A food processor or a suitable coffee or spice grinder may work, depending on the appliance’s design and the quantity you need. A grinder with a small chamber may be better for tiny batches, while a food processor may leave a coarser result.
Check the manufacturer’s instructions before using any appliance for dry grinding. If you use a small grinder, work in batches and clean it well afterward so that old flavors do not affect the flour.
Q
Is homemade oat flour cheaper than store-bought oat flour?
It can be, especially when plain oats cost less per usable amount than packaged oat flour. The actual savings depend on local prices, package sizes, and how much flour you use.
For a simple comparison, divide the price of the oats by the number of cups or grams you can use, then compare that with the cost of the same amount of ready-made oat flour. Include any flour left in the blender or sieve if you want a closer estimate.
Q
Can I use oat flour to thicken sauces?
Yes, oat flour can thicken some sauces and soups when heated with liquid. It may make the mixture look more opaque or give it a slightly oat-like flavor, so begin with a recipe that suits those qualities.
Mix the flour with a little cool liquid before adding it to a hot mixture if the recipe recommends this method. Stir well and cook as directed to reduce lumps and achieve the desired texture.
Q
How long does homemade oat flour last?
There is no single storage time that fits every batch. Shelf life depends on the freshness of the oats, how dry and clean the equipment was, the storage temperature, and whether moisture entered the container.
Keep the flour in a clean, airtight container in a cool, dry place, or refrigerate or freeze it for longer storage. Label the batch with the date and discard it if you notice an unusual odor, mold, insects, or signs of moisture damage.
✦ Wrapping Up
Conclusion
Making oat flour in a blender is a simple way to prepare a useful baking ingredient at home. Start with plain, dry rolled oats, grind a small batch until it looks like a fine powder, and sift it if your recipe needs a smoother texture. The whole process takes only a short time when your blender is suited to dry ingredients.
The most important detail is knowing how oat flour differs from wheat flour. It can work well in pancakes, muffins, cookies, and other recipes, but it does not create the same gluten structure. For the best results, choose a recipe designed for oat flour when possible and measure the ingredients carefully.
Store any leftover flour in a clean, airtight container away from heat and moisture. If gluten avoidance is essential, use oats labeled gluten-free and prevent cross-contact in your kitchen. With these simple steps, you can grind only what you need and keep a fresh batch ready for your next recipe.
💡 Key Takeaway
Measure 1 cup of plain rolled oats, place them in a clean and dry blender, and blend in short rounds until powdery. Sift if needed, then use the flour in a recipe suited to oat flour.