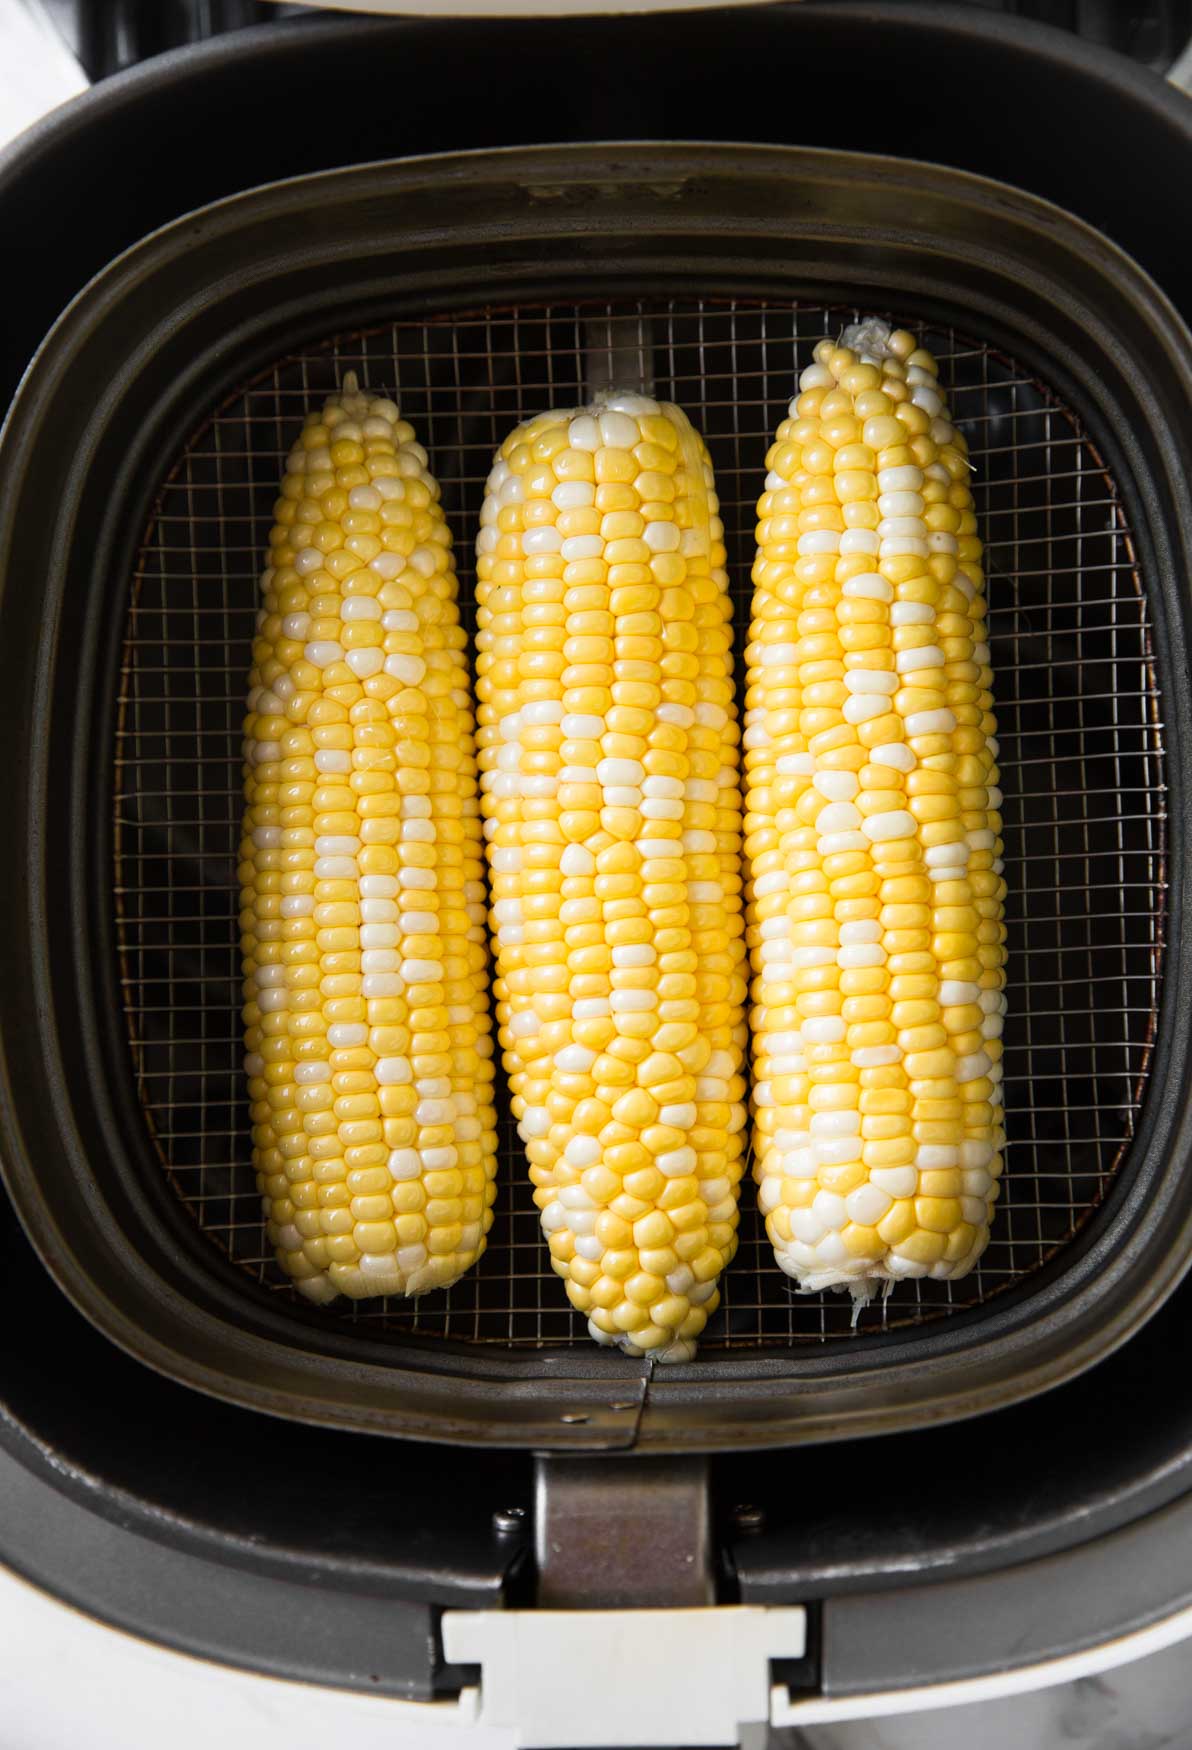
Cook corn on the cob in an air fryer at 400°F for 10 to 15 minutes, turning halfway, until tender and lightly golden.
In American kitchens, corn on the cob is a favorite side dish for summer cookouts, Fourth of July gatherings, backyard barbecues, and weeknight dinners. An air fryer offers another easy way to prepare it without heating a large oven or boiling a pot of water. You can make tender corn with lightly browned spots and a rich, buttery finish using just a few basic ingredients.
The method is simple. Remove the husks and silk, brush the ears with a little oil or melted butter, and place them in the air fryer basket in a single layer. Cook at 400°F for about 10 to 15 minutes, turning halfway through. The exact time depends on the size of the ears, the air fryer model, and how tender or browned you like your corn.
Fresh corn is a great choice, but frozen corn on the cob can work, too. This guide explains how to prepare both, how to check for doneness, which seasonings to try, and what to do if your corn comes out dry or unevenly cooked. You will also find practical tips for cooking several ears at once and serving them safely.
You only need a few ingredients to make flavorful corn in an air fryer. Fresh ears of corn, a little oil or butter, and basic seasonings are enough for a simple side dish. You do not need to soak the corn or boil it before cooking.
Choose ears that fit in your air fryer basket. If the corn is too long, trim the ends or cut each ear into shorter sections before cooking. This makes the ears easier to arrange and turn without forcing them against the heating element.
The following amounts work as a starting point for two medium ears. Adjust them to match the amount of corn you are preparing and your taste.
Source: thirtyhandmadedays.com
Fresh corn
Use two medium ears of corn, with the husks and silk removed. Look for plump kernels and ears that feel firm.
Oil or melted butter
Use about 1 to 2 teaspoons of olive oil or melted butter to coat the corn lightly. Oil can help the surface brown, while butter adds a rich flavor.
Salt and black pepper
Add a small amount before cooking or season the corn after it comes out of the basket.
Optional seasonings
Garlic powder, smoked paprika, chili powder, dried herbs, grated Parmesan, and fresh lime juice can all add flavor.
Kitchen tools
You need an air fryer, a small brush or spoon for the oil, tongs, and a plate for serving.
Should You Use Oil or Butter?
Both oil and butter work well, but they have slightly different uses. Oil gives the corn a light coating and helps the surface brown. Butter brings a familiar sweet and savory taste that pairs well with corn.
For a simple approach, brush the ears with a thin layer of oil before cooking and add butter after they are done. This lets the corn brown without using too much butter during the cooking process. You can also use melted butter from the start if you prefer its flavor.
Avoid pouring oil or melted butter directly into the bottom of the air fryer. Apply it to the corn instead, and follow your appliance manual for any restrictions on oils or accessories.
For golden corn
Use a light coating of olive or avocado oil.
For buttery flavor
Brush with melted butter or add a fresh pat after cooking.
For less added fat
Use a small amount of oil or cook without it, knowing the kernels may brown less.
How to Make Corn on the Cob in the Air Fryer Step by Step
The basic method is straightforward: prepare the corn, add a light coating of oil, arrange the ears in the basket, and cook at 400°F until tender. Most medium ears take about 10 to 15 minutes, but the best result comes from checking the kernels as they cook.
You usually do not need to pre-boil fresh corn. The circulating hot air cooks the kernels directly, and the corn’s natural moisture helps keep them tender. Turning the ears halfway through helps expose different sides to the hot air.
Before starting, check your air fryer’s instructions for temperature limits, basket capacity, and any special guidance about preheating. Some models heat quickly, while others benefit from a short preheat.
Source: iowagirleats.com
Step 1: Remove the husks and silk
Peel away all green husks and remove the fine strands of silk. Rinse the ears if needed, then pat them dry with a clean towel.
Step 2: Trim the ears
Cut off the stem ends or shorten the ears if they do not fit comfortably in the basket. Keep the pieces large enough to turn easily.
Step 3: Preheat the air fryer if needed
Set the air fryer to 400°F. If your model recommends preheating, follow its instructions before adding the corn.
Step 4: Coat the corn
Brush each ear lightly with oil or melted butter. Add a little salt and pepper if desired.
Step 5: Arrange the ears
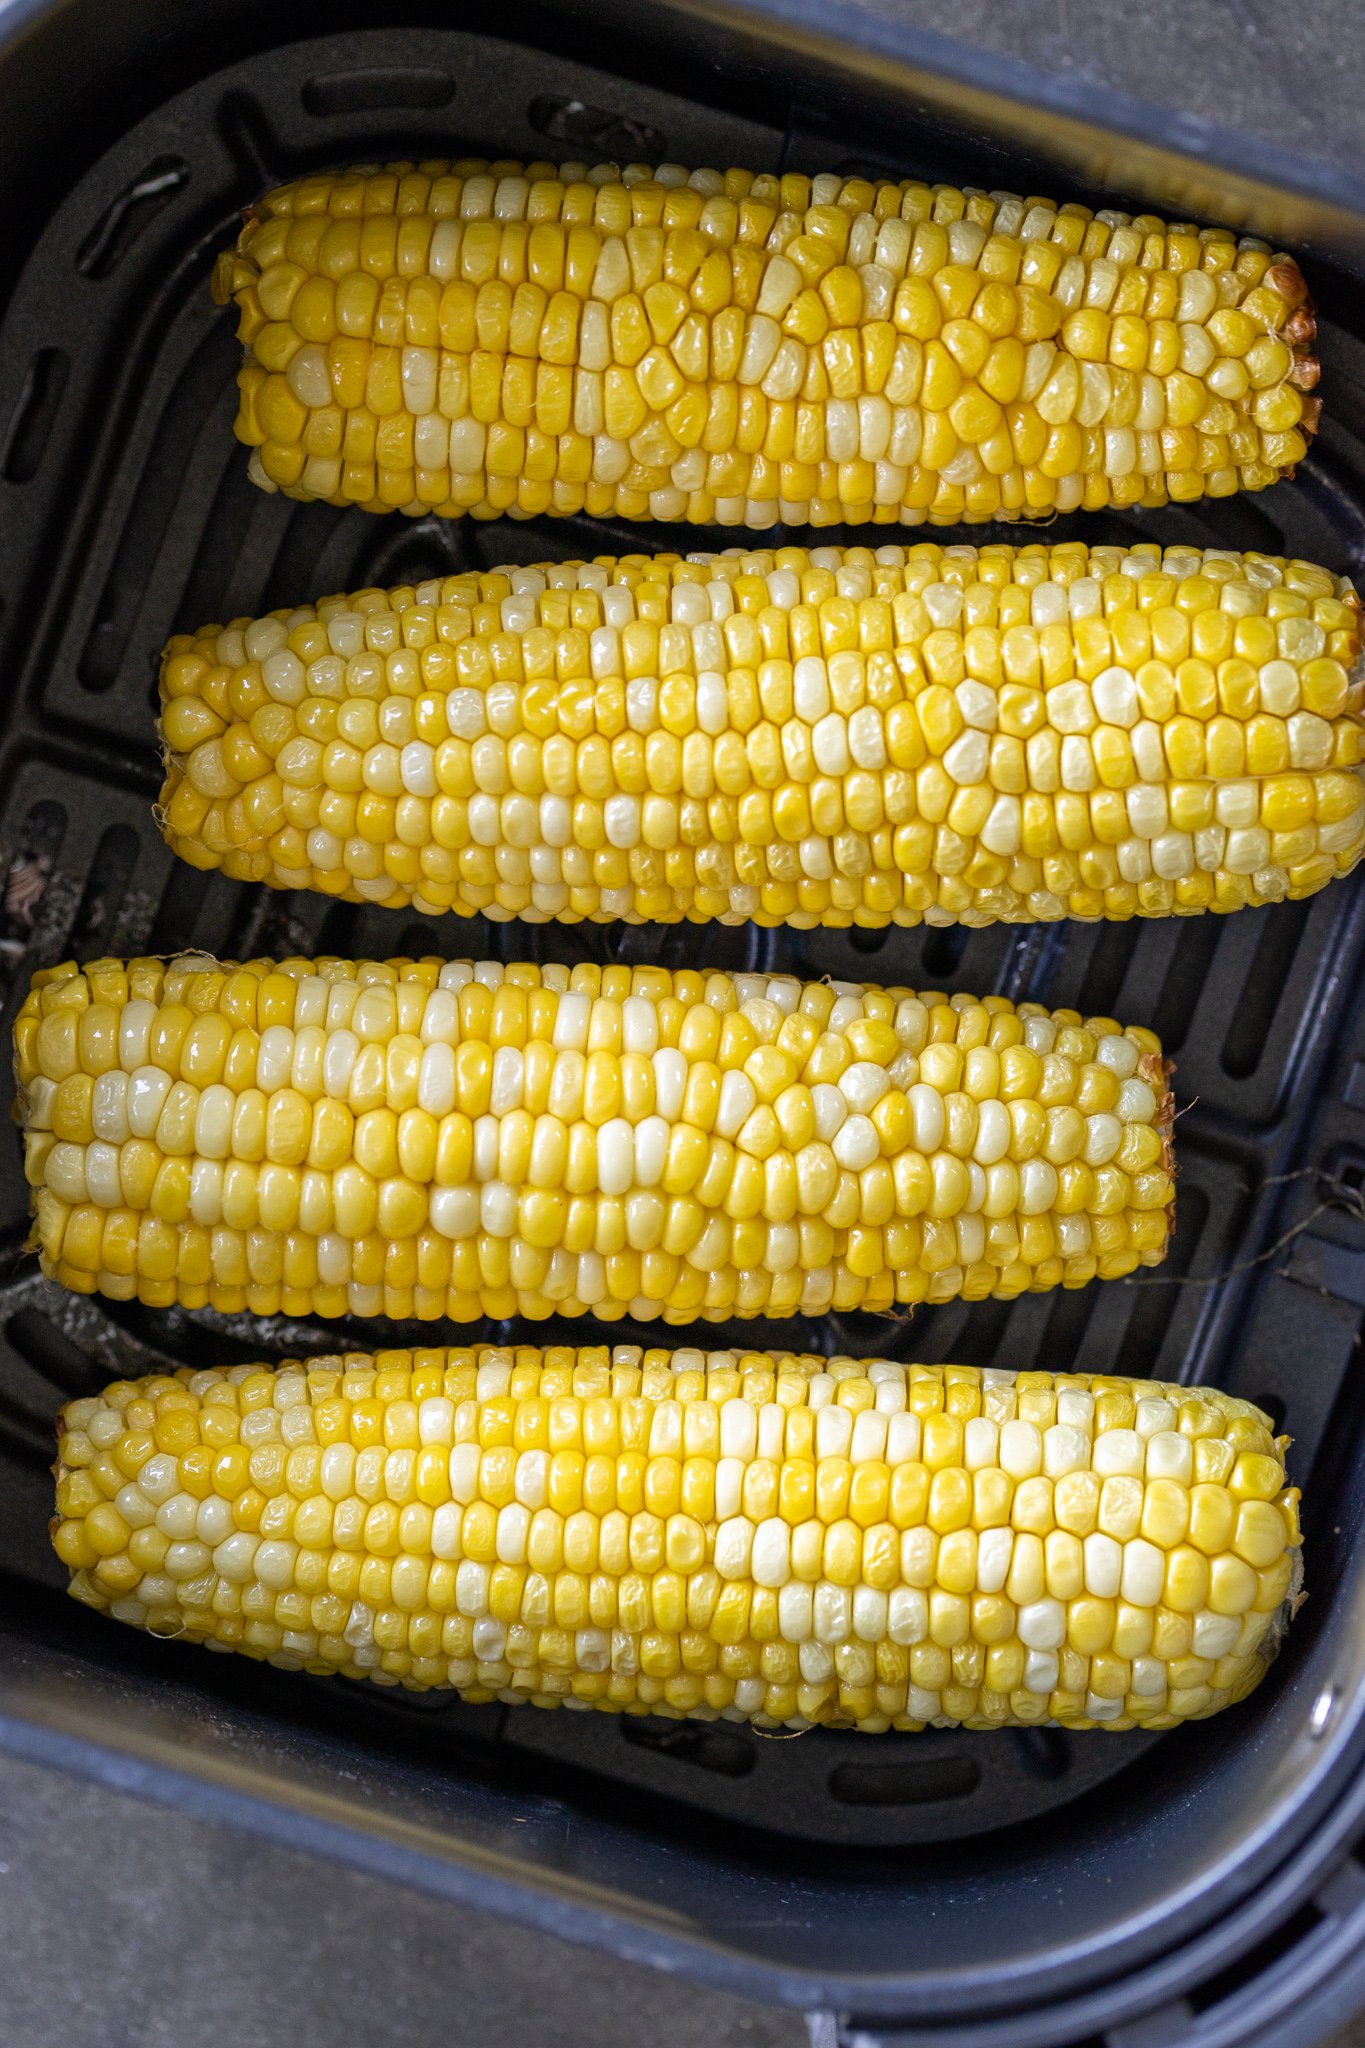
Place the corn in a single layer. Leave space around the ears so hot air can circulate, and avoid stacking them.
Step 6: Cook for 10 to 15 minutes
Air-fry at 400°F, turning the ears with tongs after about 5 to 7 minutes. Start checking the corn around the 10-minute mark.
Step 7: Check for doneness
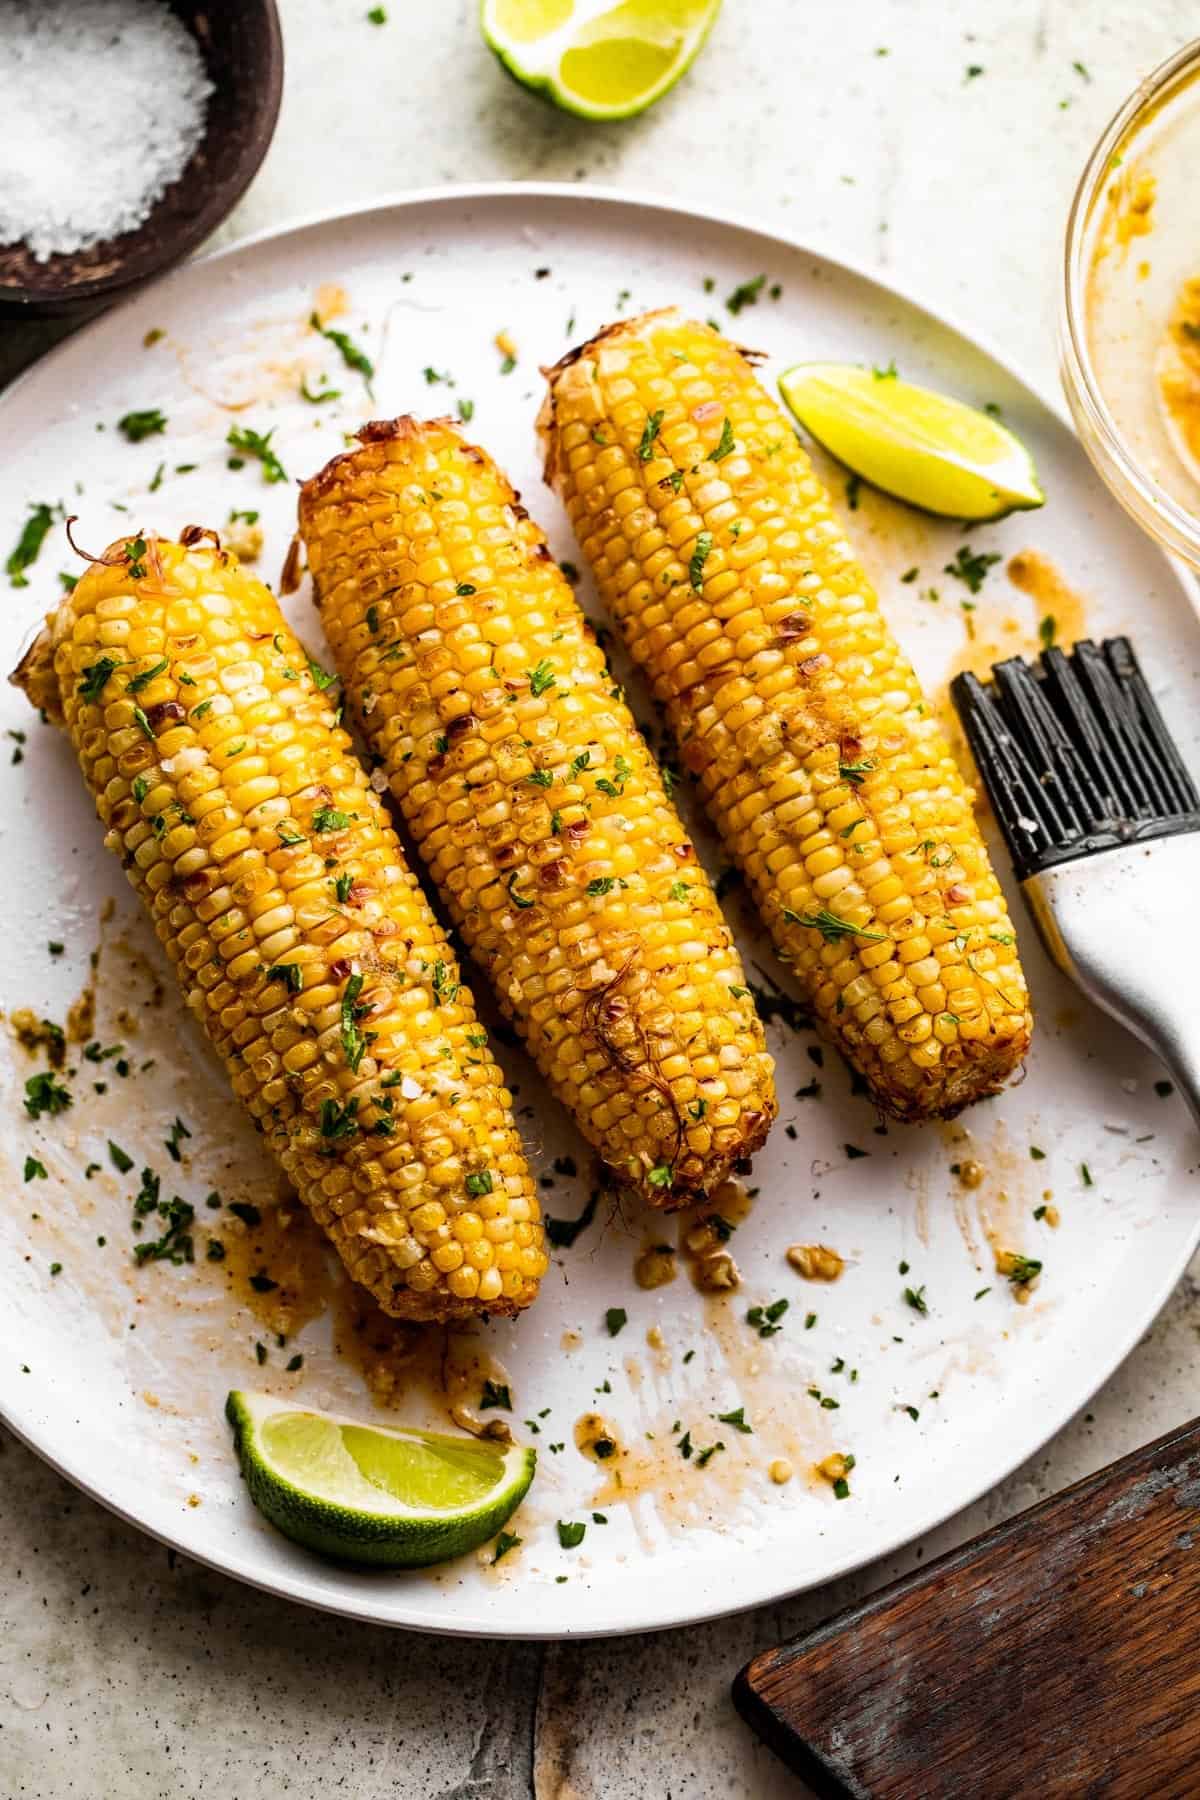
Look for hot, tender kernels and light golden or brown spots. If the kernels still feel firm, cook for another 2 to 3 minutes and check again.
Step 8: Add the finishing touches
Transfer the corn to a plate with tongs. Add butter, salt, pepper, herbs, cheese, or another favorite topping, then serve while warm.
How to Tell When the Corn Is Done
The best sign of doneness is a combination of tender kernels and an evenly heated ear. The kernels should give when you bite into them rather than feeling hard or chalky. A few golden spots are normal, but the corn does not need to be deeply browned to be ready.
Use tongs to turn the corn and inspect different sides. If the outside has dark spots but the kernels remain firm, lower the temperature slightly and continue cooking in short intervals. If the kernels are tender but pale, the corn is still ready to eat; browning is a matter of preference.
Handle the corn carefully because the ears and kernels can be very hot. Let them rest briefly before serving, especially if children will be eating them.
Tender kernels
The kernels should feel plump and yield to a bite without a hard, raw center.
Light browning
Small golden spots show that the surface has browned, although browning is not required for doneness.
Even heat
The kernels should be hot across the ear, not cold in the center or warm on only one side.
Air Fryer Corn on the Cob Temperature and Cooking Time
For fresh corn, 400°F is a useful starting temperature. Medium ears generally take about 10 to 15 minutes, while larger ears may need a little longer. Air fryers differ in basket design, fan speed, heating power, and actual cooking temperature, so treat the time as a guide rather than a guarantee.
Turning the corn halfway through helps the kernels brown more evenly. If you are cooking several ears, check each one because their size and position can affect how quickly they cook. A crowded basket may also slow cooking.
The table below gives practical starting estimates. These are general cooking ranges, not guaranteed results for every appliance.
Source: i0.wp.com
Small fresh ears
Start checking after 8 to 10 minutes at 400°F. Add more time if the kernels remain firm.
Medium fresh ears
Plan for about 10 to 15 minutes at 400°F, turning halfway through.
Large fresh ears
Allow about 12 to 18 minutes at 400°F as a starting estimate, checking tenderness before serving.
Short corn sections
Smaller pieces may cook faster than whole ears, so begin checking early.
Should You Cook Corn at 375°F or 400°F?
Both temperatures can work. At 400°F, corn often develops browned spots more quickly, which is useful if you like a roasted flavor. At 375°F, the surface may brown more slowly, giving you a little more control if your air fryer tends to cook aggressively.
If you choose 375°F, begin checking after about 12 minutes and continue until the kernels are tender. The total time may be longer than it would be at 400°F. Do not assume that changing the temperature by 25 degrees will produce the same result in every air fryer.
For a first attempt, use 400°F and check the corn early. Once you know how your appliance cooks, adjust the temperature or timing to match your preferred texture.
Choose 400°F
A good starting point when you want tender corn with light surface browning.
Choose 375°F
A useful alternative if the corn browns too quickly on the outside in your appliance.
Do You Need to Flip the Corn?
Yes, turning the ears halfway through is helpful. Air fryers move hot air around the food, but the parts closest to the basket or heating flow may brown differently from the rest. A halfway turn helps expose more of the corn to the circulating air.
Use heat-safe tongs and turn each ear gently. If the basket is small and the corn rests against the sides, rotate the ears again near the end if one side is noticeably paler than the other.
Turn halfway
Rotate each ear after roughly 5 to 7 minutes when using a 10 to 15 minute cooking range.
Check the basket
Keep the corn away from the heating element and do not force the basket closed around oversized ears.
Can You Make Frozen Corn on the Cob in an Air Fryer?
Yes, you can cook frozen corn on the cob in an air fryer without thawing it first. Frozen ears usually need more time than fresh corn because the center must heat through before the kernels become tender. The total time depends on whether the ears are whole or cut into smaller pieces and how cold they are when they enter the basket.
Start with the air fryer set to 380°F to 400°F. Arrange the frozen ears in a single layer and cook for about 12 to 18 minutes, turning halfway through. This is a starting range; large or very solid frozen ears may need additional time.
Check the corn near the end of cooking. If the kernels are still firm or the center feels cold, continue in short intervals of 2 to 3 minutes. Add butter and seasonings after cooking, or brush with a little oil once the surface has thawed enough for the coating to stick.
Source: melaniecooks.com
Use the ears straight from the freezer
There is usually no need to thaw frozen corn first, although you can thaw it in the refrigerator if you prefer more predictable cooking.
Leave room for airflow
Keep the frozen ears in a single layer rather than stacking them. If they are stuck together, separate them before placing them in the basket.
Turn during cooking
Rotate the ears halfway through to help the kernels heat more evenly.
Check the center
Frozen corn is ready when the kernels are hot and tender throughout, not merely browned on the outside.
Can You Air-Fry Frozen Corn Without Oil?
Yes. You can air-fry frozen corn without oil, and it will still heat through. The main difference is that the surface may brown less and the kernels may not have the same rich finish as corn coated with butter or oil.
If you want to avoid added fat, cook the corn plain and season it after it is done. A squeeze of lime, black pepper, chopped herbs, or a little chili powder can add flavor without requiring a buttery coating.
For a simple side
Cook the frozen corn plain, then add salt and pepper to taste.
For a fresh finish
Add lime juice or chopped cilantro after cooking.
How to Season Air Fryer Corn on the Cob
Corn has a naturally sweet flavor, so you do not need many seasonings to make it taste good. Butter and salt are a simple starting point, but spices, herbs, cheese, and citrus can turn the same basic recipe into several different side dishes.
For the best flavor, season the corn while it is warm. Butter melts into the kernels, dry spices cling to the surface, and fresh lime juice adds a bright finish. If you are using cheese, herbs, or delicate toppings, adding them after cooking can help preserve their flavor and texture.
You can prepare a few different toppings at the table so everyone can choose their own. This works especially well at summer cookouts, family dinners, and casual gatherings.
Source: cdn.momsdish.com
Classic butter and salt
Spread a little butter over the hot corn and add salt to taste. Black pepper is optional.
Garlic butter
Mix softened butter with a small pinch of garlic powder and chopped parsley, then spread it over the cooked ears.
Smoky paprika
Add smoked paprika, black pepper, and a little salt for a warm, savory flavor.
Chili lime
Sprinkle the corn with chili powder and finish with fresh lime juice for a bright, mildly spicy side.
Parmesan and herbs
Add finely grated Parmesan and chopped parsley while the corn is still warm so the cheese can cling to the surface.
Cajun-style seasoning
Use a small amount of Cajun seasoning for a bold flavor. Taste before adding extra salt because some blends already contain plenty.
How to Make Mexican-Inspired Street Corn
For a street-corn-inspired version, air-fry the corn until tender and lightly browned. Let it cool briefly, then spread on a thin layer of mayonnaise or Mexican crema, if desired. Sprinkle with crumbled cotija cheese, chili powder, and chopped cilantro, then finish with lime juice.
This is an inspired variation rather than a claim to reproduce every traditional preparation of Mexican elote. You can adjust the toppings to suit your taste or use a little plain yogurt mixed with lime juice for a tangier alternative.
Apply creamy toppings after cooking rather than placing a thick layer on the corn before air-frying. This keeps the basket cleaner and makes the toppings easier to control.
Creamy topping
Use a light coating of mayonnaise or crema after cooking.
Cheese and spice
Add cotija or another crumbly cheese with chili powder.
Fresh finish
Squeeze lime over the corn and add cilantro just before serving.
How to Cook Several Ears at Once
You can cook more than one ear at a time, provided the basket has enough room for the corn to sit in a single layer. The key is airflow. When ears overlap or press tightly against one another, the air fryer may cook them unevenly, and the corn may take longer to become tender.
For two or three ears, arrange them side by side if they fit comfortably. Turn each ear halfway through, and check the largest one before removing the batch. If your air fryer has a small basket, cooking in two batches may give you a more even result than packing everything into one load.
Cooking time does not always increase in direct proportion to the number of ears. The effect depends on the appliance and how much the extra food blocks airflow. Check the corn rather than adding a fixed amount of time for every additional ear.
Source: thebusybaker.ca
Use one layer
Arrange the ears without stacking them. Some contact is fine if air can still circulate around the corn.
Leave space
Avoid filling every gap if doing so blocks the flow of hot air.
Turn each ear
Rotate the corn individually so the sides facing the basket or one another get a chance to brown.
Cook in batches when needed
If the basket is crowded, prepare a second batch instead of forcing all the ears into the first one.
What If the Corn Does Not Fit?
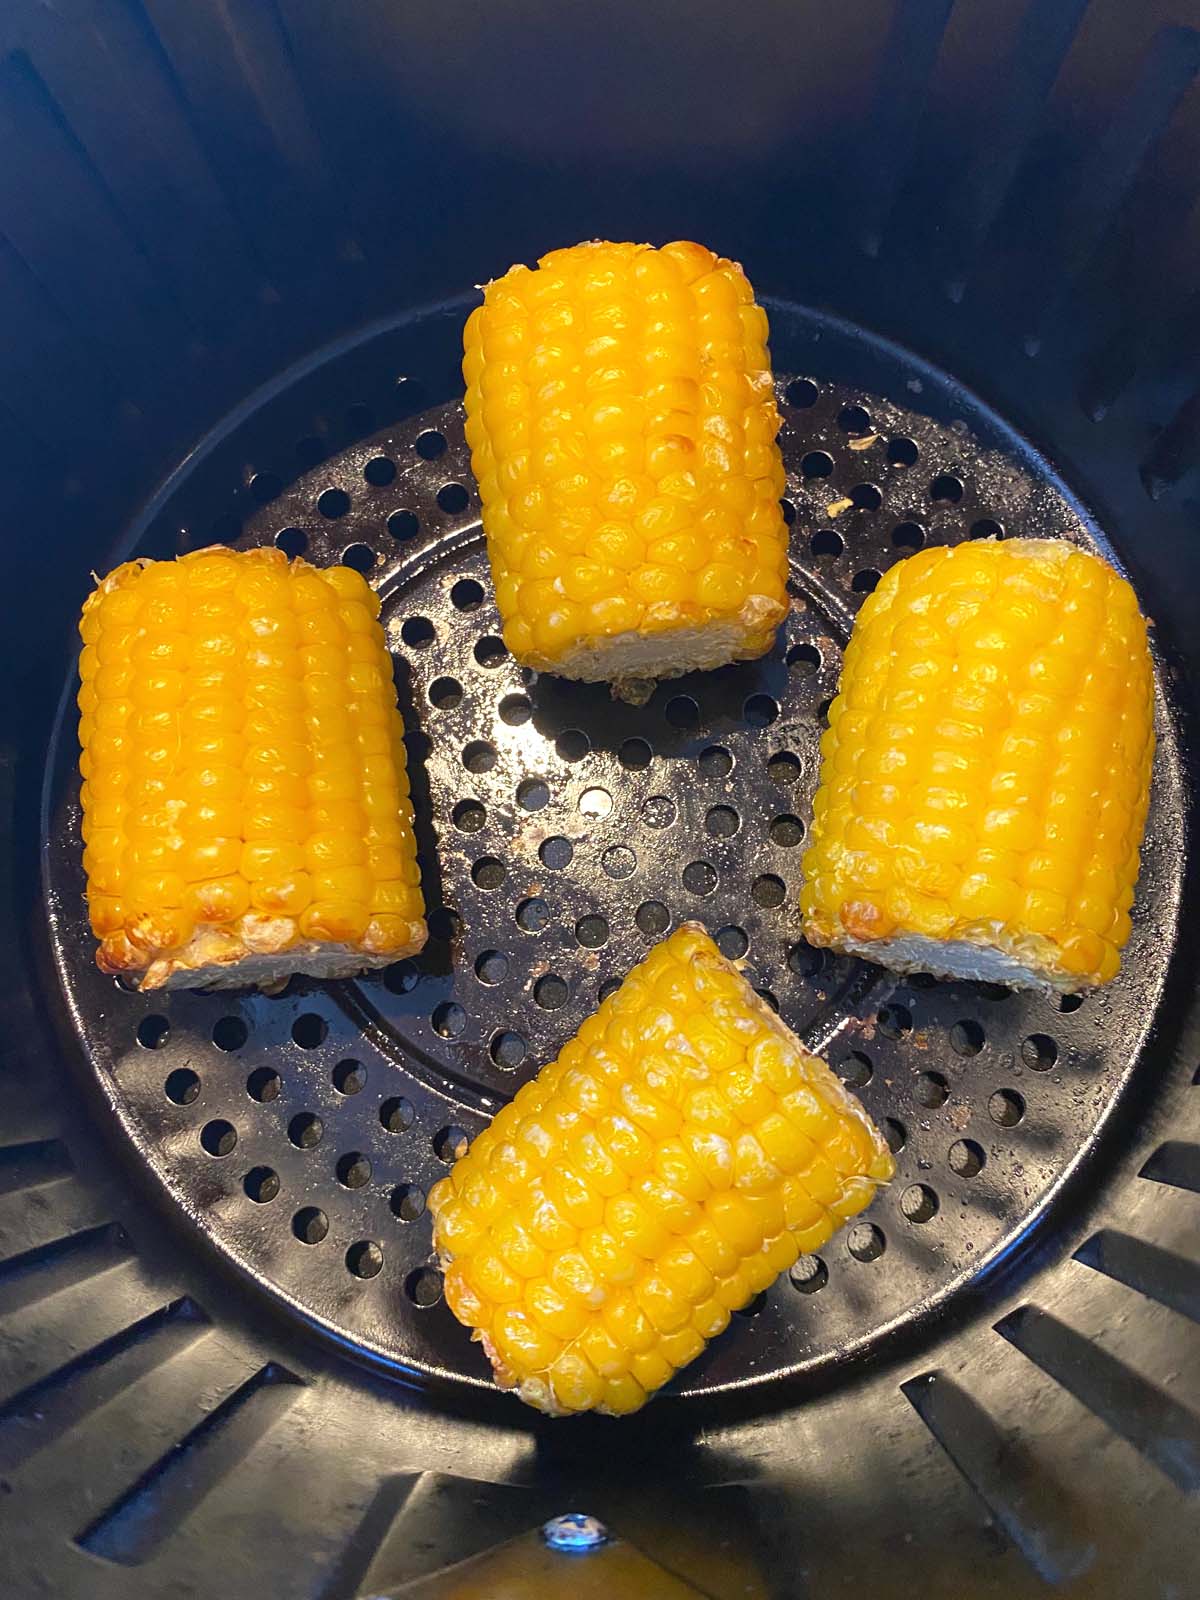
Trim the ends or cut each ear into shorter sections before cooking. Two shorter pieces can be easier to arrange than one long ear, especially in a compact air fryer. Use a stable cutting board and a sharp kitchen knife, and keep your fingers clear of the blade.
Never force an oversized ear against the heating element or try to close the basket if the corn prevents it from shutting correctly. If you cannot arrange the pieces safely, use another cooking method or cook fewer pieces at a time.
Trim carefully
Remove only enough of the ends to make the ears fit.
Cut into sections
Short sections are useful for small baskets and easy serving.
Common Air Fryer Corn Problems and How to Fix Them
If your corn does not turn out as expected, the problem is usually related to cooking time, basket space, surface moisture, or heat. A few small changes can help you get a better result on the next batch.
Do not judge the whole ear by its color alone. Some air fryers brown the outer kernels quickly, while others cook the corn more gently. Check tenderness and adjust the temperature or timing based on what you find.
Source: diethood.com
The kernels are still hard
Return the corn to the air fryer for 2 to 3 minutes at a time. Check again before adding more time, especially if the outside is already browned.
The corn is dry
Try a light coating of oil or butter and avoid cooking much longer than needed. Fresh corn that has been stored for a long time may also be less juicy.
One side is darker
Turn the ears halfway through and check that they are not crowded against the basket or one another.
The corn browns too fast
Lower the temperature to 375°F and continue cooking until the kernels are tender.
The corn stays pale
Check whether the ears are wet or crowded. Pat them dry before cooking, leave space between them, and allow another minute or two if they are already tender but you want more color.
The corn cooks unevenly
Use ears of similar size, turn each ear during cooking, and cook smaller or larger ears separately when needed.
Why Is My Air Fryer Corn Tough?
Tough corn may be undercooked, overcooked, or made from ears that were already mature or less fresh. If the kernels are firm and not tender, add a little more cooking time. If the kernels are shriveled and dry, more time may make the problem worse.
Corn freshness matters because its texture and sweetness can change during storage. When shopping, choose ears with plump kernels and avoid corn that looks dried out or damaged. Store fresh corn properly and cook it when you can for a better texture.
If your first batch comes out tough, change one thing at a time. Check the corn earlier, use a slightly lower temperature if it browns too quickly, or try fresher ears before changing several parts of the method at once.
Hard kernels
Cook for a few more minutes, then check again.
Dry or shriveled kernels
Avoid extending the cooking time without checking the texture. Add butter after cooking if desired.
Mixed results
Use similar-sized ears and make sure each one has room for airflow.
Why Is My Corn Not Browning?
Corn may remain pale if the surface is wet, the basket is crowded, or your air fryer cooks gently. Patting the ears dry and leaving space around them can help. A thin coating of oil may also help the surface brown.
If the kernels are already tender, you do not need to keep cooking simply to create dark spots. If you prefer a more roasted finish, add another minute or two and watch closely to prevent the kernels from drying out.
Dry the surface
Pat freshly rinsed corn with a clean towel before applying oil.
Improve airflow
Cook fewer ears at a time if the basket is crowded.
Watch closely
Extra cooking can add color, but too much heat may dry out the kernels.
Is Air Fryer Corn on the Cob Healthy?
Corn on the cob can be part of a balanced meal, and air-frying gives you control over how much added fat and salt you use. Plain corn provides carbohydrates, fiber, and several vitamins and minerals. The final nutrition profile depends on the portion size and the toppings you add.
Cooking corn in an air fryer does not automatically make it healthier than every other cooking method. The main benefit is flexibility: you can cook it with little or no added oil, then season it to suit your preferences. Butter, cheese, mayonnaise, and salty seasoning blends add flavor but also change the meal’s overall fat or sodium content.
If you want a lighter side dish, cook the corn with a small amount of oil or without oil and finish it with pepper, herbs, lime juice, or a little salt. If you prefer buttery corn, a modest amount of butter can still fit into a meal based on your needs and preferences.
Source: bakeitwithlove.com
Control added fat
Use a thin coating of oil or leave it out and add a small amount of butter after cooking if desired.
Watch added salt
Taste the corn before adding more salt, especially when using cheese or prepared seasoning blends.
Pair it with a balanced meal
Serve corn with a protein source and other vegetables for variety.
Does Air Frying Remove the Need for Butter?
No. Air frying cooks the corn, but it does not replace the flavor or richness of butter. You can enjoy the corn plain, with oil, or with butter depending on what you like.
If you are used to spreading butter over boiled corn, you can do the same with air-fried corn. The warm kernels help the butter melt and spread. Start with a small amount, taste, and add more only if you want it.
For a buttery taste
Add a small pat of butter after cooking.
For a fresh flavor
Use lime juice, herbs, and black pepper instead.
How to Serve and Store Air Fryer Corn on the Cob
Serve air fryer corn while it is warm, when the kernels are tender and the butter melts easily. It works well beside grilled chicken, burgers, steak, fish, barbecue dishes, veggie burgers, and other easy weeknight meals. You can also cut the cooked kernels from the cob and add them to salads, grain bowls, or other dishes.
For a cookout, prepare the corn close to serving time so it stays warm. If you need to cook several batches, keep the finished corn in a warm serving dish while you prepare the rest. Avoid leaving cooked corn at room temperature for long periods.
Refrigerate leftovers promptly in a covered container. Remove the kernels from the cob if that makes storage easier, or keep the ears whole if you have enough room. Reheat only the amount you plan to eat.
Source: iowagirleats.com
Serve with barbecue
Pair the corn with grilled chicken, ribs, burgers, or plant-based mains.
Add to salads
Cut the kernels from cooled corn and mix them into a green salad or grain bowl.
Store leftovers
Place the corn in a covered container and refrigerate it within two hours, or within one hour when the outdoor temperature is above 90°F.
Use leftovers promptly
For best quality and food safety, eat refrigerated cooked corn within three to four days.
How to Reheat Air Fryer Corn on the Cob
An air fryer can bring leftover corn back to serving temperature while adding a little surface color. Place the refrigerated ears in the basket and heat at 350°F for about 3 to 5 minutes, turning halfway through. Larger or very cold ears may need more time, so check the center before serving.
Brush the corn with a little water or add a small amount of butter if it seems dry. Avoid adding too much oil, and do not leave the corn in the air fryer longer than necessary. The goal is to warm it through without drying out the kernels.
If the corn has been stored for too long, smells unusual, or shows signs of spoilage, discard it rather than trying to make it safe by reheating. Reheating does not reliably correct unsafe storage.
Set the temperature
Start at 350°F for reheating refrigerated corn.
Heat briefly
Begin with 3 to 5 minutes, then check the center and continue if needed.
Prevent drying
Add a little butter or a light touch of moisture before reheating if desired.
Can You Freeze Cooked Corn on the Cob?
You can freeze cooked corn, although the kernels may have a softer texture after thawing and reheating. Let the corn cool promptly, remove the kernels if that makes packaging easier, and place it in a freezer-safe container or bag with as much excess air removed as practical.
Label the container with the date and use the corn while it retains good quality. Thaw it in the refrigerator or reheat it from frozen, adjusting the time as needed. Do not leave cooked corn on the counter to thaw for several hours.
Package well
Use a sealed freezer-safe container or bag to help limit freezer burn.
Label the date
A date label helps you keep track of storage time and quality.
Air Fryer Safety Tips for Cooking Corn
Air fryers use intense circulating heat, so a few basic precautions help you cook corn safely. Always remove the husks and silk before cooking unless your appliance manual specifically permits a different method. Keep the corn away from the heating element and do not use the basket if the ears prevent it from closing correctly.
Use tongs to turn and remove the corn because the ears, kernels, and basket can be very hot. Set the cooked corn on a stable plate and let it cool briefly before serving. If you are preparing corn for children, cut it into manageable portions and check the temperature before they eat.
Clean the basket and tray after the appliance has cooled. Butter and oil can leave residue, especially if they drip into the bottom of the unit. Follow the manufacturer’s cleaning directions, and never immerse an appliance’s electrical body in water.
Source: watchwhatueat.com
Keep the basket clear
Do not overload the basket or allow the corn to touch the heating element.
Use heat-safe tools
Tongs help you turn the ears without placing your hands near hot surfaces.
Avoid excess grease
Brush oil or butter onto the corn instead of pouring it into the appliance.
Follow the manual
Use approved accessories and clean the appliance according to its instructions.
Handle hot corn carefully
Allow a short cooling period before eating or serving it to children.
Can You Cook Corn in the Husk?
For this recipe, remove the husk and silk before placing the corn in the air fryer. Cooking corn in its husk is a different method, and it may not be suitable for every appliance or basket arrangement. The husk can also affect airflow and make it harder to inspect the kernels as they cook.
If you want to try a husk-on method, first check the instructions for your exact air fryer and make sure the ears fit without contacting the heating element. The peeled-corn method in this guide is the more straightforward starting point because you can coat, turn, and inspect the kernels easily.
For this recipe
Peel the corn and remove the silk before cooking.
For other methods
Check the appliance manual before cooking food with husks or other coverings.
Frequently Asked Questions
Q
How long does corn on the cob take in an air fryer?
Fresh corn on the cob usually takes about 10 to 15 minutes at 400°F. Turn the ears halfway through and check for tender kernels around the 10-minute mark. Large ears may need more time, while small ears or short sections may cook faster.
Q
Do you need to boil corn before air-frying it?
No. Fresh corn can go directly into the air fryer after you remove the husks and silk. Brush it with a little oil or butter, then cook at 400°F until the kernels are tender. Boiling first is not necessary for this method.
Q
Should you wrap corn in foil in the air fryer?
Foil is not needed for this recipe. Leaving the corn uncovered allows the circulating air to reach the surface and helps create roasted spots. If you want to use foil for another method, check your appliance manual first, secure the foil so it cannot move toward the heating element, and make sure it does not block airflow.
Q
Can you cook corn on the cob in an air fryer without oil?
Yes. You can cook corn without oil, although the kernels may brown less and the surface may not have the same rich finish. Add butter after cooking if you want a traditional flavor, or use lime juice, herbs, pepper, and spices for a lighter finish.
Q
Can you put frozen corn on the cob directly in the air fryer?
Yes. Place frozen ears in a single layer and start at 380°F to 400°F for about 12 to 18 minutes, turning halfway through. Check that the kernels are hot and tender throughout, and add a few minutes if the ears are still cold or firm in the center.
Q
Why is my air fryer corn dry?
Corn can become dry if it cooks too long, especially at a high temperature. The freshness and size of the ears can also affect the result. Start checking early, use a light coating of oil if desired, and remove the corn as soon as the kernels are tender.
Q
Can you cook canned corn on the cob in an air fryer?
Canned sweet corn is usually sold as loose kernels rather than whole ears. If you have canned loose kernels, drain them well and use an air-fryer-safe container designed for your appliance, following the manufacturer’s instructions. For whole ears, fresh or frozen corn is generally the more practical choice.
Q
What is the best temperature for air fryer corn on the cob?
A temperature of 400°F is a useful starting point for fresh corn because it cooks the kernels while helping the surface develop golden spots. If your air fryer browns the corn too quickly, reduce the temperature to 375°F and cook until tender.
✦ Wrapping Up
Conclusion
Making corn on the cob in an air fryer is an easy way to prepare a warm, flavorful side dish with little effort. For fresh corn, start at 400°F and allow about 10 to 15 minutes, turning the ears halfway through. A light coating of oil or butter helps add flavor, while salt, pepper, herbs, cheese, and lime juice give you plenty of ways to finish the dish.
Keep the ears in a single layer, check the kernels for tenderness, and adjust the cooking time to suit your air fryer. Frozen corn can work too, although it usually needs more time. With these simple steps, you can make air fryer corn for a weeknight meal, a backyard barbecue, or a summer family dinner.
💡 Key Takeaway
For your first batch, cook two peeled ears at 400°F for 10 minutes, turn them halfway through, and check the kernels. Add 2 to 3 minutes at a time until tender, then finish with butter, salt, and your favorite seasonings.