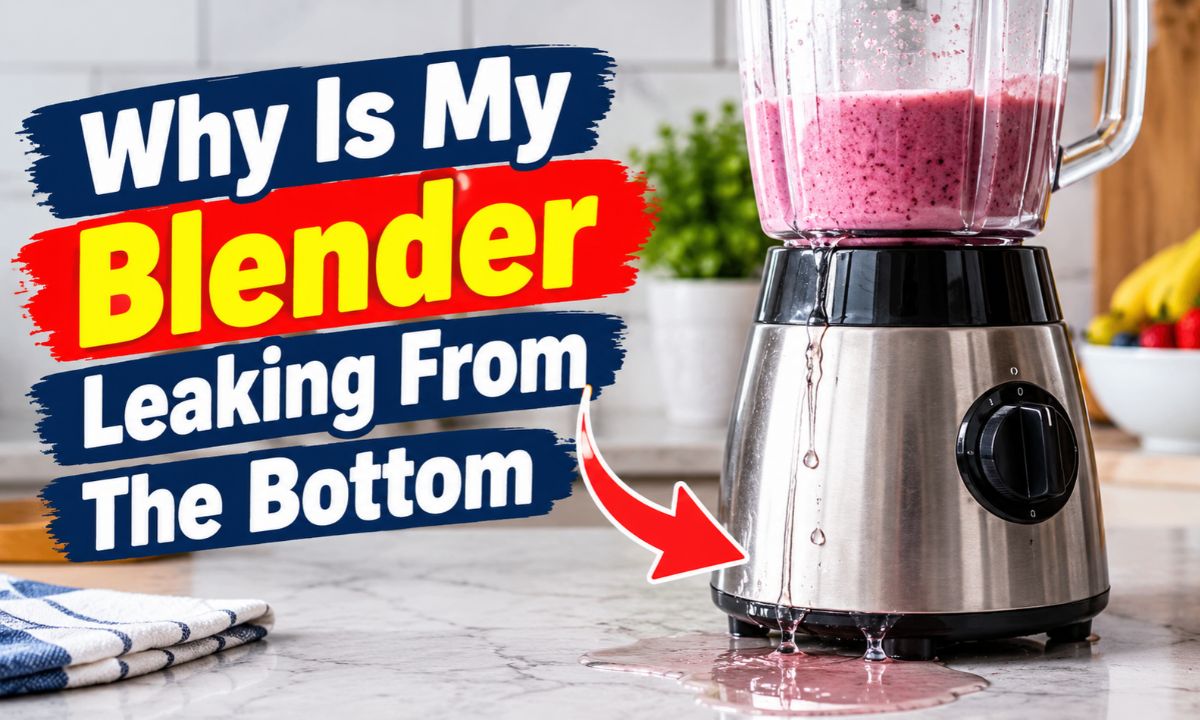
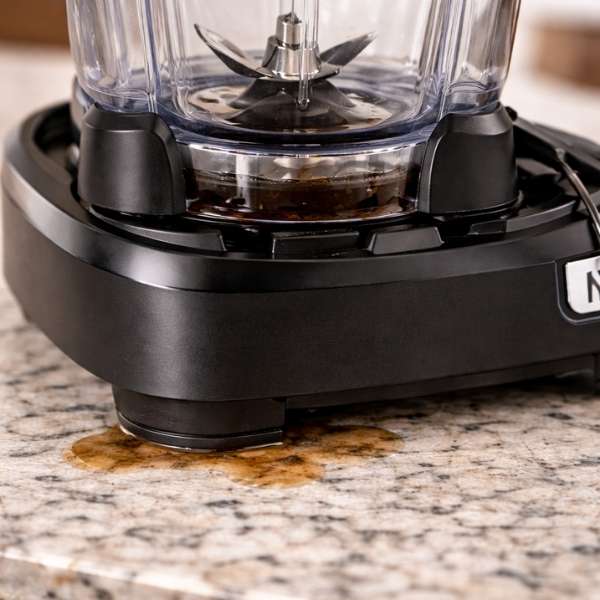
A blender usually leaks from the bottom because its rubber seal is worn, damaged, dirty, or out of place. A loose blade assembly, cracked jar, or damaged bearing seal can also cause the leak.
If your blender leaves a puddle on the kitchen counter while making a smoothie, you may have a worn seal or a loose part. This can happen when you blend frozen fruit, crush ice, or make soups and sauces at home. Before buying a new blender, check where the liquid first appears and whether the jar has a removable blade assembly.
Start by unplugging the blender and removing the jar from its motor base. Empty the jar, dry its outside, and inspect the bottom for cracks, food buildup, and loose parts. These simple checks can help you find the cause without running the blender with a leak or taking apart electrical parts.
The right fix depends on your blender‘s design. Some models have a replaceable rubber gasket, while others use a sealed blade unit that must be replaced as a complete part. Check your model’s manual before removing the blade assembly, and stop using the appliance if liquid has entered the motor base.
A blender leaks when liquid passes through a gap that should remain sealed. The seal around the blade assembly is meant to keep liquids inside the jar while the blades spin. If that seal fails, liquid can move down the threads or around the blade housing and drip onto the counter.
The leak may look as if it comes from the motor base, even when the actual problem is higher up. Liquid can travel along the outside of the jar, collect beneath it, and then drip from the lowest point. Drying the appliance and checking where the first fresh drop appears can help you tell the difference.
A leak that starts only when you blend may point to a seal, crack, or blade assembly problem. A leak that continues while the filled jar sits unused may indicate a poor seal or a crack that allows liquid to escape under gravity. Neither pattern identifies the exact fault on its own, so inspect the parts before deciding what to replace.
Source: kitchkap.com
Worn or damaged gasket
The rubber ring may be flattened, torn, brittle, stretched, or missing. Liquid can pass through the gap it should seal.
Loose blade assembly
A removable blade unit that is not fitted according to the manual may fail to seal against the jar.
Cracked jar or base threads
A hairline crack or damaged connection can create a path for liquid to escape.
Failed bearing seal
A damaged seal around the blade shaft can allow liquid into the blade housing, sometimes with grinding or unusual noise.
Liquid inside the motor base
A leak from the jar can run into the electrical housing. This is a safety concern, not a reason to keep testing the blender.
Where Is the Leak Actually Coming From?
Look at the jar, blade housing, and motor base as separate areas. Liquid around the jar’s lower rim often points to the gasket or the way the blade assembly fits. Liquid coming directly through the blade shaft area may indicate a failed internal seal.
If the counter is wet only under the motor base, do not assume the motor itself is the source. Liquid may have traveled from the jar. Unplug the appliance, remove the jar, and inspect the accessible surfaces without opening the electrical housing.
Wet around the jar threads
Inspect the gasket, jar rim, threads, and blade assembly for food debris, damage, or incorrect fitting.
Wet near the center of the blade housing
A damaged shaft seal or blade assembly may be responsible. Replace the approved assembly if the design does not permit seal repair.
Wet inside the motor base
Stop using the blender and arrange an appropriate inspection or replacement. Do not power it on to see whether it still works.
1. Check the Blender Gasket First
The gasket is one of the first parts to inspect because it forms a barrier between the jar and the blade assembly. Depending on the model, it may sit around the blade housing, beneath a removable blade unit, or inside a fitted sealing system. A gasket that is out of place can let liquid escape even when the rest of the jar looks fine.
Rubber seals can wear with repeated use, cleaning, heat exposure, and contact with food. A ring may become stiff, flattened, stretched, or torn. Food pulp can also collect around the sealing surface and prevent the gasket from sitting flat.
Unplug the blender and remove the jar. Follow the manual to access the gasket, then inspect it under good light. If the seal is removable, check that it sits evenly in its groove and that no food or other debris blocks the sealing surface.
Source: kitchenaims.com
Look for visible damage
Replace a gasket that has a split, tear, hard patch, permanent deformation, or other clear damage.
Check for food residue
Clean the gasket and its approved seating area with a soft cloth or brush. Avoid sharp tools that could cut the rubber.
Confirm the correct position
Fit the seal in the orientation and groove specified by the manufacturer. Do not stretch it to make it fit.
Use a model-compatible part
A ring that looks similar may have the wrong thickness or shape. Match the replacement to the blender’s exact model.
Can You Fix a Blender Leak by Replacing the Gasket?
Yes, if the gasket is the source of the leak and your blender uses a replaceable seal. A new, correctly fitted gasket can restore the seal without replacing the whole appliance. However, a gasket will not fix a cracked jar, damaged threads, or a failed bearing seal.
Do not use glue, silicone caulk, plumber’s tape, or an improvised rubber ring to seal the jar. These materials may not be suitable for food contact, moving blades, heat, or repeated washing. Use the part and installation method specified in the manual.
Signs the repair may work
The gasket is visibly damaged or displaced, while the jar rim, threads, and blade housing appear intact.
Signs another part may be at fault
The leak continues after a correct seal replacement, or the blade shaft feels rough, wobbles, or makes unusual noise.
2. Inspect the Blade Assembly and Jar Threads
A blade assembly can leak if it is loose, cross-threaded, damaged, or fitted with a seal that does not sit correctly. On some blenders, the blades and jar form a removable unit. On others, the blade system is built into the container and cannot be removed safely by the user.
If your model has a removable assembly, check the connection for worn threads, chips, stuck food, and visible damage. Follow the manual for removal and refitting. Do not force a tight assembly or use pliers to turn parts unless the manufacturer specifically instructs you to do so.
Threads help hold the parts together, but they do not always provide the liquid seal by themselves. The gasket usually performs that job. Tightening a loose connection may help if it was fitted incorrectly, but excessive force can damage plastic parts, deform a seal, or make future removal harder.
Source: tophomeapps.com
Remove food buildup
Clean accessible threads and sealing surfaces with a soft brush, then rinse and dry them as directed by the manual.
Check the fit
Refit the assembly evenly. If it binds, sits crooked, or will not engage smoothly, stop and inspect the parts.
Inspect the threads
Look for stripped sections, chips, or cracks. Damaged threads may prevent the assembly from sealing securely.
Replace damaged parts
Use a compatible replacement assembly or jar. Do not continue using a part that cannot lock into place as intended.
Why Tightening the Base May Not Stop the Leak
A leaking blender does not always need a tighter blade assembly. If the gasket is worn or the jar has a crack, more force will not restore the seal. It may make the damage worse.
If the assembly feels secure but liquid still escapes, inspect the gasket and jar rather than repeatedly tightening the connection. If the leak continues after the correct parts are clean and fitted, the blade unit may need replacement.
Avoid over-tightening
Use the fitting method in the manual. Stop if the assembly resists normal hand fitting or the plastic begins to flex.
Do not dismantle sealed units
If the blade assembly is designed as a sealed replacement part, replace the unit instead of opening its bearings or shaft seal.
3. Look for Cracks in the Blender Jar
A cracked blender jar can leak even when the gasket and blade assembly are in good condition. Small cracks may form near the bottom, around the blade opening, or beside the threads. A jar may also become damaged after a fall, impact, or repeated exposure to conditions outside its care instructions.
Empty the jar and inspect the base, sides, rim, and connection points under bright light. Look for fine lines, chips, cloudy stress marks, and damaged threads. A crack may be difficult to see when the jar is wet, so dry it before inspecting it.
Replace a cracked jar rather than trying to patch it. Adhesives and sealants can fail under vibration, liquid pressure, cleaning, or temperature changes. A damaged jar can also weaken further during blending, creating a risk of leaks or breakage.
Source: longroadhomeproject.com
Check the area around the blade opening
This connection must remain secure and leak-resistant. Any crack or chip near the seal is a reason to stop using the jar.
Inspect the threads and rim
A chipped or warped connection can prevent a good seal even if the gasket is new.
Consider the jar material
Plastic and glass jars can both be damaged. Follow the model’s care instructions and replace a damaged container with a compatible part.
Do not patch the jar
Tape, glue, and household sealants are not reliable repairs for a food container that must withstand blending forces.
Could Hot Liquids Cause a Blender to Leak?
Hot liquids can contribute to leaks if the blender is not designed for them or if the jar, lid, or seal cannot handle the temperature. Heat can also make some materials expand, soften, or become more vulnerable to damage. A leak that occurs only with hot soup deserves careful attention to the manufacturer’s temperature limits.
Some blenders are designed to process hot ingredients, while others are not. Check the manual before blending soup or hot sauces. Never pour hot liquid into a sealed container unless the manufacturer permits it, because steam and pressure can force liquid out or cause the lid to open unexpectedly.
Follow the temperature limit
Use only the hot-liquid procedure specified for your model.
Check for temperature-related damage
Inspect the jar, seal, and connection for warping, cracks, or a seal that no longer fits.
4. Check for a Failed Blade Shaft or Bearing Seal
If the gasket and jar look sound but liquid still leaks through the blade housing, the seal around the blade shaft may have failed. The shaft connects the blades to the drive mechanism. A seal helps keep liquid away from the bearing area and other parts that should remain dry.
Signs of a possible shaft or bearing problem include repeated leaks from the center of the blade assembly, rough blade movement when checked according to the manual, grinding sounds, or unusual wobbling. These signs are clues rather than proof of a specific fault. A damaged assembly may need replacement even when the external gasket looks normal.
Do not dismantle the bearing housing unless the manufacturer provides a repair procedure for that exact part. The blades are sharp, and the internal assembly may be difficult to reassemble correctly. A sealed blade unit should generally be replaced as a unit when its internal seal fails.
Source: indoorguider.com
Watch for repeat leaks
If the leak returns after the gasket is correctly fitted or replaced, the problem may be deeper in the blade assembly.
Pay attention to unusual noise
Grinding, scraping, or new vibration may indicate a damaged blade unit or bearing.
Keep hands away from sharp blades
Unplug the blender before handling the blade unit. Do not touch the cutting edges to check for wear.
Choose the correct repair
Use an approved replacement assembly or contact an appliance repair service if the internal part is not user-serviceable.
Why Is My Blender Leaking Black or Brown Liquid?
Dark liquid near the bottom of a blender can come from food residue, old moisture mixed with debris, or material released from a damaged internal component. Its color alone cannot identify the source. Brown liquid may be a mixture of food particles and water, while dark residue near a shaft may warrant a closer inspection of the blade assembly.
Stop using the blender if the liquid has an oily appearance, contains unusual particles, smells burnt, or appears to come from inside the motor base. Do not taste the liquid or assume that it is harmless food residue. Clean only accessible, removable parts according to the manual, and have the appliance assessed if the source remains unclear.
Food-colored residue
Check the accessible jar, gasket, and blade housing for trapped ingredients after unplugging the appliance.
Dark or oily fluid from the shaft
A damaged seal or internal component may be involved. Stop using the blender and arrange service or replacement.
Burnt odor or liquid in the motor base
Disconnect power if safe to do so and do not run the blender again until it has been assessed.
5. Follow a Safe Step-by-Step Leak Check
A careful inspection can help you find the cause without exposing yourself to sharp blades or electrical hazards. You will need a dry cloth, good lighting, and the blender’s manual. A soft brush may help clean removable parts, but do not use sharp tools or abrasive materials on sealing surfaces.
Do not begin by filling the jar and switching on the motor. First inspect the parts while the blender is unplugged. If you find a crack, a damaged blade assembly, or evidence that liquid entered the motor base, stop the troubleshooting process and arrange a suitable repair or replacement.
Source: fixitwired.com
Step 1: Unplug the blender
Switch it off and disconnect the plug before touching the jar, gasket, or blade assembly. If the plug or outlet is wet, do not touch wet electrical parts; disconnect power at a safe point or seek qualified help.
Step 2: Empty and dry the jar
Pour out the contents and dry the outside so old spills do not hide the leak’s source.
Step 3: Inspect the jar
Check the bottom, walls, rim, threads, and blade opening for cracks, chips, warping, or other damage.
Step 4: Inspect the gasket
Look for dirt, flattening, tears, stretching, or incorrect placement. Remove it only if the manual permits this.
Step 5: Check the blade assembly
Look for damage, trapped food, worn threads, or signs of a failing shaft seal. Avoid dismantling sealed components.
Step 6: Clean and refit approved parts
Wash removable parts as directed, let them dry, and reassemble them according to the manufacturer’s instructions.
Step 7: Decide whether the blender is safe to use
If you found damage or liquid inside the motor base, do not test the blender. If the cause was a correctable fitting or cleaning issue, use the manual’s approved procedure to determine whether further checking is allowed.
How Do You Know Whether the Fix Worked?
A successful repair should leave the jar, gasket, and blade connection correctly fitted, with no visible damage and no sign of leakage during any manufacturer-approved check. Do not rely on a quick motor test to prove that an electrical appliance is safe after liquid has entered its housing.
If the blender still leaks after a permitted seal replacement and correct reassembly, stop. The jar, threads, blade assembly, or internal seal may be damaged. Further tightening or repeated testing can make the problem worse.
The leak stops after cleaning and refitting
Food debris or incorrect assembly may have caused the original leak. Continue to follow the normal care instructions.
The leak remains at the jar base
Inspect for cracks and confirm the gasket and blade assembly match the model.
The leak returns near the blade shaft
A failed internal seal or bearing may require a replacement blade assembly or professional service.
The motor base became wet
Do not reconnect power just to check whether the blender works. Arrange qualified assessment or replace the appliance.
6. Match the Symptom to the Likely Cause
The place where liquid appears, when the leak starts, and any other symptoms can narrow down the likely cause. Use the table below as a starting point, not as a definite diagnosis. Several faults can produce similar puddles, especially when liquid runs along the outside of the jar.
Always check the simplest safe explanations first, such as food buildup or a misplaced removable gasket. If the signs point to a crack, internal shaft leak, or wet motor base, do not keep using the blender while you investigate.
Source: i.ebayimg.com
Read the pattern, not just the puddle
The lowest wet spot may not be the source. Dry the accessible surfaces before inspection and look for the first point where fresh liquid appears, without powering the blender.
Blender Leak Troubleshooting Table
Use this comparison to choose your next safe action. A replacement part should match the exact model and should be installed only if the manufacturer permits user replacement.
Liquid around the jar’s bottom edge
Possible cause: worn, dirty, or misplaced gasket. Next step: inspect and clean the approved sealing area, then replace the gasket if damaged.
Leak from the center of the blade housing
Possible cause: failed shaft seal or blade assembly. Next step: stop use and inspect or replace the approved assembly.
Leak from a visible crack
Possible cause: damaged jar or connection. Next step: replace the damaged jar or part; do not patch it.
Leak after the jar was washed or reassembled
Possible cause: gasket out of place or assembly fitted incorrectly. Next step: unplug the blender and refit the parts according to the manual.
Leak only with hot contents
Possible cause: temperature limits, damaged seals, or an unsuitable jar. Next step: stop using hot liquids until you confirm the model’s instructions.
Dark fluid, grinding, or burnt smell
Possible cause: internal wear, a failed seal, or another mechanical fault. Next step: stop using the appliance and arrange service or replacement.
Liquid appears inside the motor base
Possible cause: liquid has passed beyond the jar or blade housing. Next step: keep the appliance unplugged and seek qualified assessment.
7. How to Prevent a Blender From Leaking Again
Regular care can reduce the chance of another leak. Clean the jar and removable sealing parts after use, remove food buildup from accessible grooves, and inspect the gasket when you notice drips. Follow the care instructions for your model instead of assuming that every blender can be cleaned the same way.
Avoid forcing parts together or using the blender with a jar that does not lock into place as intended. Do not run the motor with an empty jar unless the manual permits it. When blending thick mixtures, use the recommended speed and filling limits rather than forcing the motor to work against a jam.
Store the jar and blade assembly so the gasket is not stretched, pinched, or exposed to unnecessary damage. Replace worn seals before they fail completely. A little routine care is often easier than cleaning a sticky mixture from the counter and motor housing.
Source: cdn.shopify.com
Clean after each use
Remove food residue from the jar and accessible sealing areas. Follow the manufacturer’s instructions for cleaning removable parts.
Avoid harsh tools
Use soft brushes and suitable cleaning products. Sharp tools can scratch plastic or cut a rubber seal.
Respect fill and temperature limits
Overfilling or using liquids outside the model’s permitted temperature range can contribute to spills and other problems.
Inspect the seal during routine cleaning
Look for tears, stiffness, flattening, and debris. Replace a damaged gasket with the specified part.
Handle the jar with care
Avoid drops, impacts, and forcing the jar onto the motor base. Inspect it after a fall before using it again.
Use compatible replacement parts
Check the exact model number before ordering a gasket, jar, or blade assembly.
Does Dishwasher Cleaning Cause Blender Leaks?
Dishwasher cleaning can contribute to wear or damage if the manufacturer does not approve it for the jar, gasket, lid, or blade assembly. Heat and strong detergents may affect some materials over time. Other blender parts are designed to tolerate dishwasher cleaning when placed on the correct rack or cleaned in a specified way.
Check the care label or manual for each removable part. If a gasket becomes misshapen, brittle, or loose after cleaning, replace it with the approved part. Never put the motor base in water or a dishwasher.
Check dishwasher compatibility
Confirm which parts are dishwasher-safe and any placement or temperature limits.
Inspect after washing
Make sure seals remain intact and sit correctly before reassembly.
8. Should You Repair or Replace the Blender?
Repair is often worth considering when the problem is limited to an inexpensive, replaceable gasket or a compatible jar part. The decision changes when the jar is cracked, the blade assembly has failed, or liquid has entered the motor base. In those cases, the cost, availability of parts, and safety of the repair matter more than the original purchase price.
Before ordering anything, find the model number on the appliance label or in the user manual. Confirm that the part fits that exact model and that the manufacturer permits the repair. Parts that look alike may have different dimensions or sealing designs.
If the appliance is under warranty, check the warranty terms before taking it apart. Unauthorized repairs or damage caused by improper use may affect coverage, depending on the terms. Contact the manufacturer or an authorized service provider if the correct part or repair method is unclear.
A gasket is damaged but other parts are sound
A compatible replacement seal may be a practical repair if the model supports gasket replacement.
The jar is cracked
Replace the jar with an approved part. Compare the cost of the jar with that of a new appliance.
The blade assembly leaks internally
Check whether the manufacturer sells a replacement assembly and whether the repair is user-serviceable.
Liquid reached the motor base
Do not power the blender to test it. Qualified service or replacement may be the safer option.
Parts are unavailable or repair costs are high
Compare the repair cost, warranty status, expected remaining service life, and price of a suitable replacement.
What If Your Blender Is Still Under Warranty?
Keep the model number, proof of purchase, and a description of the leak ready when contacting the manufacturer. Explain where the liquid appears, when it started, and whether you noticed cracks, unusual noise, or other changes. Photos of the unplugged appliance and visible damage may help the service team assess the issue.
Do not continue using a leaking blender while waiting for a response. Avoid opening sealed components before checking the warranty terms and service instructions. The manufacturer can tell you whether a replacement part, authorized repair, or other remedy is available.
Record the symptoms
Note whether the leak occurs while standing, during use, or after cleaning, without running a blender that may be unsafe.
Confirm part compatibility
Use the full model number when asking about a replacement gasket, jar, or blade assembly.
9. Common Mistakes to Avoid When Fixing a Leak
A quick fix can make a small problem harder to repair. Before applying force or buying parts, confirm where the leak starts and which components your blender allows you to remove. The goal is to restore the proper seal without damaging the jar or creating a new safety risk.
Some faults cannot be fixed through cleaning or tightening alone. A damaged bearing seal, cracked container, or wet electrical housing needs a different response. Stop when the repair goes beyond the user-serviceable steps in the manual.
Running the blender to find the leak
Do not power the blender while it is leaking or while parts are exposed. Use visual inspection of the unplugged appliance and approved service methods.
Over-tightening the blade unit
Excessive force can damage threads and plastic parts. Follow the manufacturer’s fitting method.
Using household glue or sealant
Improvised materials may be unsuitable for food contact, heat, movement, and cleaning. Replace damaged parts instead.
Ignoring a burnt smell or grinding sound
These symptoms may indicate a mechanical or electrical fault. Stop using the blender and arrange an assessment.
Assuming every blender has a removable gasket
Some designs use a sealed blade assembly. Do not force the unit apart if the manual does not provide a removal procedure.
Putting the motor base under water
Clean the motor housing only as directed. Never immerse it or rinse it under a tap.
10. When Should You Stop Troubleshooting?
Stop troubleshooting if the leak reaches the motor base, the plug or outlet becomes wet, the appliance smells burnt, or you see sparks or damaged wiring. Do not touch wet electrical parts or reconnect power to check whether the blender still works. If the appliance is plugged into a wet area, avoid contact and disconnect power only from a safe, dry location; seek qualified help if needed.
A cracked jar, loose blade unit that will not lock properly, or severe blade wobble also calls for replacement or professional service. A blender jar can hold moving blades and may be exposed to vibration during use, so a damaged connection should not be treated as a minor cosmetic issue.
If the cause is unclear after inspecting the accessible parts, contact the manufacturer or a qualified appliance repair service. Give them the model number and describe the leak pattern. A clear description can help them decide whether the problem is likely to involve a replaceable seal, a damaged jar, or an internal fault.
Electrical warning signs
Burning odor, sparks, a wet plug, or liquid inside the motor housing means you should stop and avoid powering the appliance.
Structural damage
Cracks, chips near the blade opening, and damaged locking threads mean the affected part should not be used.
Repeated leaks after repair
A recurring leak may indicate a faulty blade assembly, damaged seating surface, or another issue that needs service.
11. Useful Next Questions Before You Replace a Part
Once you know roughly where the leak begins, the next step is to identify the part and confirm the correct repair. The exact model matters because jar designs, seals, blade units, and cleaning rules vary. These checks can prevent you from buying a part that does not fit or attempting a repair the manufacturer does not support.
What is the exact blender model?
Find the model number on the label or in the manual. A brand name alone is not enough to confirm that a gasket or blade unit will fit.
Does the leak start while the jar sits still?
A leak at rest may point to a poor seal or crack, while a leak during operation can also involve vibration or a failing blade assembly. Neither pattern proves the cause.
Can the gasket be replaced separately?
Check the manual or the manufacturer’s parts list. If the blade assembly is sealed, use the approved replacement unit rather than dismantling it.
Is the motor base completely dry?
If you suspect liquid has entered the housing, do not plug in the appliance to find out. Arrange an assessment.
Is repair cost reasonable?
Compare the cost and availability of the correct part with the price of a suitable replacement blender, taking warranty coverage into account.
Frequently Asked Questions
Q
Why is my blender leaking from the bottom when it is not running?
A blender that leaks while standing still may have a worn gasket, a poorly fitted blade assembly, or a crack in the jar. Gravity can allow liquid to escape through a gap even when the blades are not moving. Unplug the blender, empty the jar, dry it, and inspect the accessible parts before deciding what to replace.
Q
Can I use my blender if it only leaks a little?
No. A small leak can spread into the motor base or worsen during use. Stop using the blender until you find and correct the cause, and do not power it on if liquid may have reached electrical parts.
Q
How much does it cost to fix a leaking blender?
The cost depends on the model and the damaged part. A replaceable gasket may cost less than a jar or blade assembly, while professional service can add labor costs. Check current prices for compatible parts and compare the total repair cost with replacement before making a decision.
Q
Can I replace the blender seal myself?
You may be able to replace the seal if your model has a user-replaceable gasket and the manual provides instructions. Unplug the blender first, use the correct part, and follow the specified assembly method. If the seal is built into a sealed blade unit, replace the complete approved unit or seek service.
Q
Why does my blender leak after I clean it?
The gasket may have shifted, the blade assembly may not be fitted correctly, or a part may have been damaged during cleaning. Check the manual for approved cleaning and reassembly steps. Inspect the gasket and threads before using the blender again, and replace any damaged parts.
Q
Why is my blender leaking black or oily liquid?
Dark liquid may be food residue, trapped moisture mixed with debris, or a sign of a damaged internal seal or component. Color alone cannot identify the source. If the liquid looks oily, smells burnt, contains unusual particles, or comes from the motor base or blade shaft, stop using the blender and arrange service or replacement.
Q
Can I fix a leaking blender with silicone or glue?
Do not use household glue, silicone caulk, or improvised sealants on the jar or blade assembly. These products may not be suitable for food contact, heat, vibration, or repeated washing. Replace the damaged part with one approved for your exact model.
Q
Should I replace the whole blender if the bottom leaks?
Not always. A replaceable gasket or jar may be enough if the motor base and other parts remain sound. Replacement may make more sense if the internal blade seal has failed, compatible parts are unavailable, repair costs are high, or liquid has entered the electrical housing.
✦ Wrapping Up
Conclusion
A blender that leaks from the bottom often has a worn gasket, a loose blade assembly, or a damaged jar. Start with a safe visual inspection of the unplugged appliance, then check the sealing surfaces, threads, and accessible parts. Replace damaged components only with parts that match your exact model.
If the leak comes from the blade shaft, returns after a correct repair, or leaves liquid inside the motor base, do not keep testing the blender. Follow the manufacturer’s repair guidance or contact a qualified service provider. A small leak is easier to address when you find the cause before it damages other parts.
💡 Key Takeaway
Unplug the blender, empty and dry the jar, inspect the gasket and jar for damage, and confirm the correct replacement part before using the appliance again.