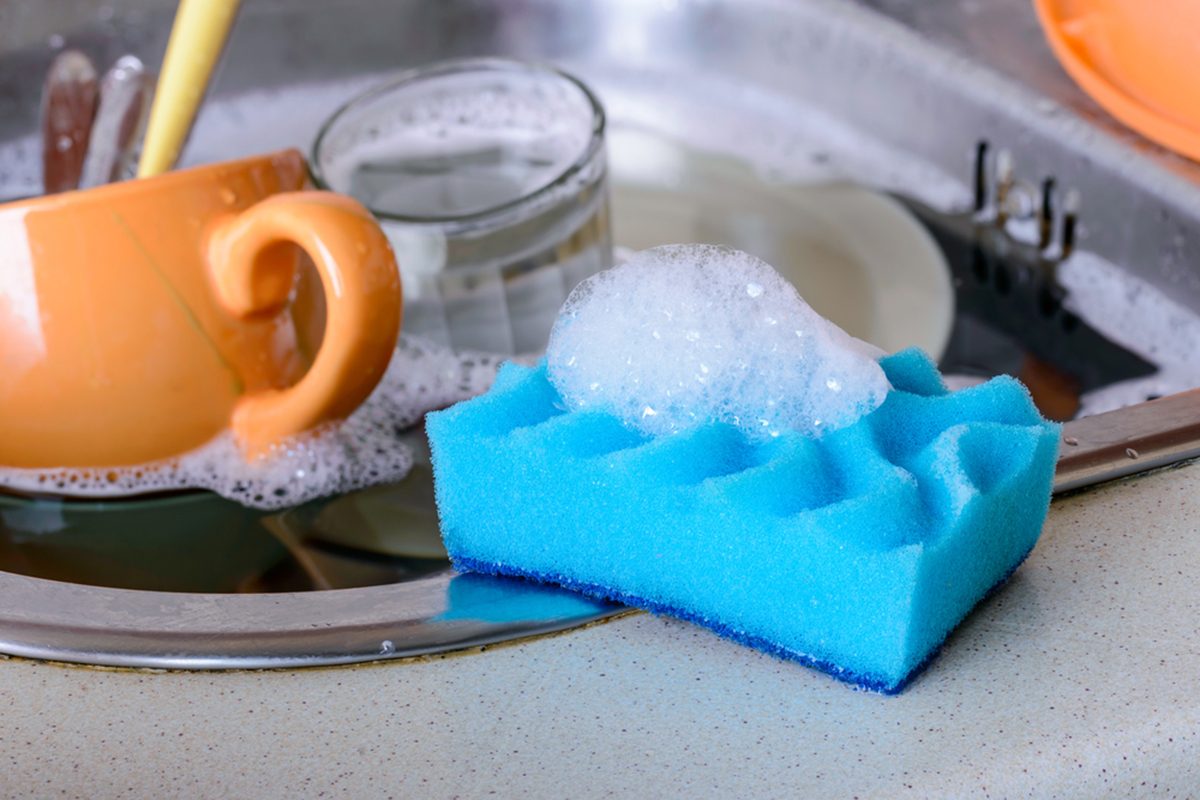
Replace a regular kitchen sponge every 1 to 2 weeks, or sooner if it smells, feels slimy, or becomes damaged.
In American homes, kitchen sponges handle a little bit of everything. They scrub plates after dinner, wipe food from cookware, clean sticky pans, and soak up water around the sink. Because they stay wet and collect food bits, these handy tools can become a home for unwanted germs.
So, how often should you replace kitchen sponge? A good household rule is every 1 to 2 weeks. The University of Minnesota Extension also recommends replacing kitchen sponges within this time, even when you clean them often. A sponge used heavily may need to go sooner.
The calendar is only part of the answer. A sponge that smells sour, feels slimy, falls apart, or has been used to clean up raw meat juices should be thrown away right away. Cleaning can lower the number of germs, but it does not make an old sponge safe forever.
The goal is simple: keep your dishes clean without spreading germs around your kitchen. A regular replacement routine, good drying habits, and safe cleaning methods can help you do that without wasting sponges.
Most households should replace a regular kitchen sponge every 1 to 2 weeks. This is a practical food-safety guideline, not a fixed expiration date that applies to every sponge. How you use, clean, and store it can change how quickly it wears out.
The University of Minnesota Extension recommends replacing kitchen sponges every 1 to 2 weeks or sooner if the material becomes worn. The American Cleaning Institute also advises frequent replacement and highlights odor, damage, and discoloration as warning signs.
A sponge used several times a day to wash dishes may need replacement sooner than one used only for light cleaning. A sponge that stays wet in a crowded sink also deserves more attention because moisture and trapped food can support microbial growth.
Even if a sponge looks clean, do not keep it for months. Harmful bacteria are not always visible, and a fresh-looking sponge is not proof that it is free from contamination.
Source: Taste of Home
Light daily use
Follow the 1-to-2-week replacement schedule and clean the sponge regularly.
Heavy daily use
Consider replacing it closer to once a week, especially if it stays wet or collects food residue.
Bad smell or slimy texture
Throw it away immediately instead of trying to make it last until the scheduled replacement day.
Raw meat or poultry cleanup
Discard the sponge after this use to avoid spreading foodborne pathogens.
Why Is Every 1 to 2 Weeks a Useful Rule?
A kitchen sponge has a porous structure. Its small openings trap water, grease, food particles, and other debris. These conditions can support the growth of bacteria when the sponge stays damp.
Research published in the Journal of Food Protection has examined how foodborne pathogens can grow and survive in kitchen sponges. A 2026 report from the German Federal Institute for Risk Assessment also described how bacteria such as Salmonella and E. coli can multiply in sponges and transfer to other surfaces.
These findings help explain why frequent replacement matters. A sponge is not like a plate that you can wash and inspect easily. Germs can remain inside its small openings, even when the outside looks clean.
Moisture
A wet sponge gives many microorganisms a suitable place to survive and grow.
Food residue
Small food particles trapped inside the sponge can provide nutrients for microorganisms.
Repeated contact
The sponge can transfer microorganisms from one dish or surface to another.
Is a Two-Week-Old Sponge Always Unsafe?
Not every sponge becomes equally contaminated on the same day. Its condition depends on the type of sponge, how often you use it, what you clean with it, and how well it dries.
Still, the two-week point is a sensible time to replace a traditional sponge rather than trying to stretch its life. A clean appearance does not prove that it is safe to keep using.
If you want to reduce uncertainty, follow a weekly replacement routine for heavily used sponges and a maximum of two weeks for ordinary use. Replace it earlier whenever you notice a warning sign.
7 Signs Your Kitchen Sponge Needs Replacing
A regular replacement schedule is helpful, but your sponge can become unsuitable for use before its planned replacement date. Check its condition each day, especially after washing greasy cookware or cleaning a messy sink.
Some warning signs are easy to spot. Others, such as harmful bacteria inside the sponge, cannot be judged by appearance alone. Use these signs as reasons to replace a sponge sooner, not as a complete test of its safety.
Source: dailymail.com
1. A sour or unpleasant smell
A persistent sour, musty, or rotten smell can point to trapped moisture and food residue. If the odor remains after cleaning, discard the sponge.
2. A slimy surface
A slippery or sticky feel can indicate buildup and poor cleaning. Do not continue using a sponge that remains slimy after rinsing.
3. Visible mold
Black, green, or other unusual fuzzy growth is a clear reason to throw the sponge away. Do not try to scrub mold out and keep using it.
4. Discoloration
New dark patches, unusual stains, or deep discoloration can signal trapped dirt or wear. Replace the sponge if the changes do not wash away.
5. Crumbling material
Loose pieces, torn edges, and a breaking scrub pad show that the sponge has reached the end of its useful life.
6. Food particles that will not come out
If grease, crumbs, or other debris remain trapped inside after a thorough rinse, choose a fresh sponge.
7. A known contamination event
If the sponge has cleaned raw poultry juices, raw meat spills, or an area contaminated with vomit or fecal matter, discard it instead of returning it to dishwashing.
Should You Wait Until a Sponge Smells Bad?
No. Smell is a warning sign, but the absence of a bad smell does not mean a sponge is clean. The 2026 German Federal Institute for Risk Assessment report describes tests in which sponges carried harmful bacteria without looking dirty or smelling unusual.
This means you should not use your nose as your only safety check. Follow a regular replacement schedule even when the sponge seems fine.
Think of smell and visible damage as extra reasons to replace a sponge early. They should never be the only reasons you decide to buy a new one.
What Makes a Kitchen Sponge Wear Out Faster?
The way you use your sponge can make a big difference in how long it remains useful. A sponge used for every kitchen task may collect more grease, food debris, and moisture than one used only for washing dishes.
Some daily habits also make it harder for a sponge to dry. When it stays wet for long periods, microorganisms may survive and multiply. A simple change in how you store it can help reduce this problem.
Source: indianexpress.com
Frequent use
Washing dishes after every meal adds more moisture and food residue to the sponge.
Poor storage
Leaving a sponge in a pool of water or inside a closed container slows drying.
Cleaning greasy pans
Heavy grease and stuck-on food can become trapped in the sponge and make rinsing harder.
Using one sponge for every surface
Moving between dishes, sinks, countertops, and raw food spills increases the chance of cross-contamination.
Infrequent cleaning
A sponge that is never cleaned or sanitized can collect more unwanted material between uses.
How Humidity and Slow Drying Affect a Sponge
A sponge dries best when air can reach all sides. If it sits in a deep sink, a closed plastic tub, or a crowded holder, moisture can remain trapped inside for a long time.
Warm and humid kitchens can make drying even slower. This does not mean you need to replace every sponge after one humid day, but it does make good storage more important.
After washing dishes, rinse the sponge well, squeeze out extra water, and place it upright or on a raised holder. Keep it away from standing water so air can move around it.
Does Using Dish Soap Make a Sponge Safe?
Dish soap helps remove grease and food from a sponge. Rinsing with clean water also washes away some loose material and microorganisms.
However, ordinary dish soap is not the same as a validated sanitizing method. It may clean the sponge without removing every harmful microorganism hidden inside its pores.
Use dish soap and rinsing as part of your normal cleaning routine, but do not treat them as a reason to keep an old sponge longer than recommended.
How to Clean and Sanitize a Kitchen Sponge Safely
No matter which method you choose, cleaning and sanitizing are not the same as replacing a sponge. A worn sponge can remain difficult to clean even after treatment.
Also, do not use a sponge that has cleaned raw meat juices and then try to save it with a microwave or bleach soak. Discard it instead.
Source: absolutecleaning.com.sg
Method 1: Use a Dishwasher
A dishwasher can be a useful way to clean a sponge that the manufacturer labels as dishwasher-safe. The University of Minnesota Extension recommends using a dishwasher sanitizing cycle with a heated drying cycle.
Place the sponge in a secure area of the dishwasher where it will not block the spray arms or fall onto the heating element. Use the recommended cycle for the appliance and sponge material.
Remove the sponge after the cycle and let it dry fully before storing it. If it comes out damaged, slimy, or smelly, replace it.
Check the label
Make sure the sponge is suitable for dishwasher use.
Use an appropriate cycle
Choose a sanitizing cycle and heated drying when the sponge and appliance support them.
Inspect after cleaning
Discard a sponge that has started to break apart or still has an unpleasant odor.
Method 2: Sanitize a Microwave-Safe Sponge
Some ordinary sponges can be treated in a microwave, but this method requires care. Never place a dry sponge in a microwave because it can overheat or catch fire.
First, check that the sponge is microwave-safe and contains no metal. Rinse away food debris, soak the sponge thoroughly with clean water, and place it in a microwave-safe container.
Follow the cleaning instructions provided by a trusted food-safety source or the sponge manufacturer. The University of Minnesota Extension describes heating a fully wet sponge for one minute on high, flipping it with tongs, and heating it for another minute.
Allow the sponge to cool before handling it. Steam and hot water can cause burns, so never squeeze it immediately after heating.
Never microwave a dry sponge
A dry sponge can overheat and create a fire hazard.
Avoid metal
Never microwave a sponge with a metallic scrub pad or other metal parts.
Allow cooling time
Use tongs to handle the hot sponge and let it cool before touching it.
Method 3: Use a Suitable Bleach Solution
A properly prepared chlorine bleach solution can sanitize a compatible sponge. The American Cleaning Institute gives a specific method using three tablespoons of chlorine bleach in one quart of water, with a five-minute soak.
Use regular, unscented household bleach and follow its label directions. Bleach products vary in strength, so do not assume that every product needs the same dilution.
Keep the solution away from children and pets. Wear gloves if needed, rinse the sponge as directed, and let it air-dry before use. Never mix bleach with vinegar, ammonia, or other cleaning products because dangerous gases can form.
Use the correct bleach
Choose a suitable regular household bleach product and follow its label.
Measure carefully
Do not guess the bleach-to-water ratio.
Never mix cleaners
Keep bleach separate from vinegar, ammonia, acids, and other household cleaners.
How to Make Your Kitchen Sponge Last Longer Between Replacements
Good sponge care can help reduce unwanted buildup between replacement dates. The aim is not to keep one sponge for months. It is to prevent avoidable contamination while getting reasonable use from each sponge.
A few small habits after every dishwashing session can make your cleaning routine easier. You do not need expensive products or a complicated cleaning plan.
Source: homekitchenmagazine.com
1. Rinse after every use
Hold the sponge under clean running water to remove soap, loose food, and grease.
2. Squeeze out extra water
Press out as much water as possible without tearing the material.
3. Store it in an open holder
Use a raised sponge rack that allows air to reach the sides and bottom.
4. Sanitize it regularly
Use a suitable cleaning method according to the sponge label and food-safety guidance.
5. Keep it away from raw food spills
Use disposable paper towels for raw meat and poultry juices rather than your dish sponge.
6. Replace it on schedule
Set a weekly reminder or mark a replacement date on your kitchen calendar.
Choose the Right Sponge Holder
A good sponge holder should allow water to drain away and air to reach the sponge. Avoid small containers that collect water at the bottom.
A holder with open sides or raised supports is usually more useful than a closed box. Place it near the sink but away from areas where food scraps and dirty dishes collect.
Clean the holder itself on a regular basis. A dirty sponge rack can transfer residue back onto a freshly cleaned sponge.
Keep Separate Cleaning Tools for Different Jobs
Using one sponge for every kitchen task creates unnecessary risks. A sponge used for dishes should not also become your tool for cleaning the garbage disposal area, wiping countertops, and soaking up raw food juices.
Use a clean dishcloth or a suitable surface cleaner for countertops. Use disposable paper towels for raw meat juices, then clean and sanitize the affected surface according to its material and the product label.
This simple separation helps prevent germs from moving between different parts of your kitchen.
When Should You Replace a Kitchen Sponge Immediately?
Some situations call for immediate replacement, even if your sponge is only a day or two old. Food contamination is more important than the age of the sponge.
Raw meat and poultry juices can carry harmful microorganisms. If a sponge picks up these liquids, keeping it for regular dishwashing can create a path for cross-contamination.
Source: www.pinterest.com
After cleaning raw chicken juices
Throw away the sponge rather than using it to clean plates, utensils, or counters.
After cleaning raw beef or pork juices
Discard the sponge because it may have picked up foodborne pathogens.
After cleaning vomit or fecal contamination
Do not return the sponge to ordinary kitchen use. Use suitable disposable cleaning materials and follow appropriate disinfection guidance.
After mold growth
Discard the sponge instead of trying to remove visible mold.
After severe material damage
Replace a sponge with torn layers, crumbling foam, or deep damage that prevents proper cleaning.
What If You Accidentally Used a Contaminated Sponge on a Plate?
Do not panic. First, stop using the sponge and throw it away. Wash the affected dish with hot, soapy water and rinse it well.
For dishwasher-safe dishes, a complete dishwasher cycle can provide an additional cleaning step. Follow the manufacturer’s instructions for items that cannot go in the dishwasher.
If the sponge touched ready-to-eat food, discard that food when contamination is a concern. Clean and sanitize any affected food-contact surfaces with a product approved for that use.
Wash your hands after handling the sponge or contaminated cleaning materials. Going forward, keep a separate tool for ordinary dishwashing and avoid using it on raw food spills.
Does Your Household Need to Replace Sponges More Often?
Some households may benefit from a shorter replacement schedule. This is especially true when young children, older adults, or people with weakened immune systems live in the home.
These groups may face a greater risk of serious illness from certain foodborne infections. The German Federal Institute for Risk Assessment recommends more frequent sponge replacement in households with vulnerable individuals.
You do not need to create a complicated schedule. Choose a fresh sponge at least weekly, maintain good food-handling habits, and replace it immediately after a contamination event.
Source: Taste of Home
Homes with young children
Use a cautious replacement schedule and keep dishwashing tools clean and dry.
Homes with older adults
Consider replacing heavily used sponges weekly and avoid using them for raw food cleanup.
Homes with people who have weakened immune systems
Use fresh cleaning tools more often and consider a dish brush or washable cloth that can be cleaned thoroughly.
Busy family kitchens
Frequent dishwashing and heavy food preparation may make weekly replacement more practical.
Should You Replace a Sponge Every Week Instead of Every Two Weeks?
Weekly replacement is a reasonable choice if your sponge gets heavy daily use or your household has people who may be more vulnerable to foodborne illness.
For ordinary household use, the 1-to-2-week recommendation remains a practical guide. There is no single replacement date that guarantees safety for every sponge and every kitchen.
If you are unsure about a sponge’s history or condition, choosing a new one is a simple and low-cost precaution.
Are Dish Brushes and Dishcloths Better Than Kitchen Sponges?
A dish sponge is not your only option for washing dishes. Dish brushes and washable dishcloths can be useful alternatives, especially if you want a cleaning tool that dries faster or can be washed more easily.
The University of Minnesota Extension notes that brushes can dry more quickly than sponges or cloth materials. The 2026 German Federal Institute for Risk Assessment report also discusses brushes and microfiber cloths as alternatives that can harbor lower bacterial counts and dry faster.
Each option has its own care needs. The best choice depends on your dishwashing habits, the surfaces you clean, and how easily you can keep the tool clean.
Source: maidsalamode.com
Dish brushes
Their open bristles can dry faster than a sponge. Clean and sanitize the brush regularly, including the handle and head.
Microfiber cloths
These can be washed in a washing machine when the care label allows it. Use a fresh cloth regularly and let it dry fully.
Cotton dishcloths
These are reusable and easy to launder. Change them daily or more often if they become heavily soiled.
Traditional sponges
These are useful for scrubbing and absorbing water but need frequent cleaning, careful storage, and regular replacement.
How Often Should You Replace a Dish Brush?
Dish brushes do not follow the same replacement schedule as traditional sponges. Their lifespan depends on the bristle material, handle design, frequency of use, and manufacturer instructions.
Clean and sanitize a suitable brush after use, then allow it to dry. Replace it when bristles become worn, bent, dirty, or difficult to clean.
A brush with a detachable head may be easier to maintain because you can replace the working part without discarding the entire handle.
How Often Should You Wash a Kitchen Dishcloth?
A kitchen dishcloth should be changed daily, or sooner if it becomes wet, greasy, or heavily soiled. Unlike a traditional sponge, most reusable cloths can be washed in a laundry machine.
Use the hottest suitable wash setting allowed by the fabric care label, then dry the cloth completely. Keep separate cloths for dishes, hands, and kitchen surfaces to reduce cross-contamination.
Do not leave a damp dishcloth folded on the counter overnight. Hang it in an open area so it can dry between uses.
Which Kitchen Cleaning Tool Is Best?
A dish brush may be a better fit if you wash many dishes and want a tool that can drain and dry quickly. A washable cloth may suit people who prefer to change cleaning materials often and wash them with laundry.
A traditional sponge remains useful for certain scrubbing tasks, but it needs more careful attention because its porous body can hold moisture and food residue.
You can also use more than one tool. For example, use a dish brush for plates, a clean cloth for suitable kitchen surfaces, and paper towels for raw meat spills.
A Simple Kitchen Sponge Replacement Schedule
A basic schedule makes sponge care easier to remember. Instead of waiting for a smell or a change in color, decide when to replace the sponge and keep a spare ready.
The following table gives practical household guidance. These are suggested routines based on use and condition, not separate official expiration dates for each sponge type.
Source: homekitchenmagazine.com
Suggested Replacement and Cleaning Routine
Use this schedule as a starting point and adjust it when your sponge becomes damaged or contaminated. When in doubt, replace it rather than trying to extend its life.
Every use
Rinse away food particles, squeeze out extra water, and place the sponge in an open holder.
Daily
Check its condition and sanitize it using a suitable method according to the product instructions.
Every 7 days
Review the sponge carefully. Consider replacing it if it receives heavy daily use or is used in a busy household.
Every 1 to 2 weeks
Replace a traditional kitchen sponge as a regular household practice.
Immediately when needed
Discard it after raw meat cleanup, visible mold, persistent odor, sliminess, or serious damage.
Common Kitchen Sponge Replacement Mistakes to Avoid
Even people who clean their kitchens often can make mistakes with sponges. Most problems come from treating a sponge like a permanent cleaning tool instead of something that needs regular care.
Avoiding a few common habits can make your kitchen routine safer and easier.
Source: dailymail.com
Keeping a sponge until it falls apart
A sponge can carry unwanted microorganisms long before its material breaks down. Replace it on schedule.
Trusting appearance alone
A sponge can look clean while still carrying harmful bacteria. Follow a regular replacement routine.
Using vinegar as a guaranteed sanitizer
Vinegar is not a reliable substitute for a validated sponge-sanitizing method.
Microwaving a dry sponge
This creates a fire hazard. Only use a microwave method when the sponge is suitable and completely wet.
Mixing bleach with other cleaners
Never mix bleach with vinegar, ammonia, or other cleaning chemicals.
Storing a sponge in standing water
A sponge that sits in a puddle takes longer to dry and may collect more residue.
Using the same sponge on raw meat spills and dishes
This can spread harmful microorganisms between food-contact surfaces.
Can You Boil a Kitchen Sponge to Make It Last Longer?
Some sponge materials can tolerate heat treatment, but boiling is not a reason to keep a sponge indefinitely. Heat can reduce certain microorganisms, yet it does not reverse material damage or remove every possible contamination concern.
Check the manufacturer’s instructions before using a heat-based method. Replace the sponge if it smells, feels slimy, has mold, or has been used for raw meat cleanup.
Does Antibacterial Dish Soap Remove the Need to Replace a Sponge?
No. Antibacterial dish soap does not remove the need for proper cleaning, drying, and replacement. Food residue and moisture can remain trapped inside the sponge.
Continue to follow the recommended replacement schedule, even if you use a dish soap that makes antibacterial claims.
Frequently Asked Questions
Q
Can I use the same kitchen sponge for a month?
It is better not to use a traditional kitchen sponge for a full month. A common food-safety guideline is to replace it every 1 to 2 weeks, even when you clean it regularly.
A sponge used heavily may need to be replaced sooner. Odor, sliminess, mold, and damage are reasons to discard it immediately.
Q
How often should I sanitize my kitchen sponge?
Daily sanitizing is a useful routine for households that continue using traditional sponges. The University of Minnesota Extension recommends looking for a sponge that can be sanitized and planning to sanitize it daily.
Use a suitable dishwasher, microwave, or sanitizer method according to the sponge manufacturer’s instructions. Remember that sanitizing does not replace the need for regular sponge replacement.
Q
Can I clean a kitchen sponge with vinegar?
Vinegar is not a dependable substitute for a validated sponge-sanitizing method. It may help with some household cleaning tasks, but you should not assume it removes harmful microorganisms from a porous sponge.
Use a suitable dishwasher cycle, a safe microwave method, or a properly prepared bleach solution when the sponge instructions allow it. Never mix vinegar and bleach.
Q
Should I throw away a kitchen sponge if it smells bad?
Yes. A persistent sour or musty smell is a good reason to replace your sponge. It may indicate trapped food residue, moisture, and microbial growth.
Do not rely on rinsing or adding dish soap to remove the smell and continue using the same sponge. Choose a fresh one.
Q
Can a kitchen sponge spread Salmonella and E. coli?
Yes. Research has shown that harmful bacteria, including Salmonella and E. coli, can survive and multiply in kitchen sponges under suitable conditions. A contaminated sponge may transfer microorganisms to dishes, countertops, and other surfaces.
This is why you should avoid using dish sponges to clean raw meat juices and replace a sponge after such contamination.
Q
Is it safe to put a kitchen sponge in the washing machine?
Some reusable cleaning cloths and certain sponge-like products can be washed in a washing machine, but traditional kitchen sponges are not always suitable for this method. Check the manufacturer’s instructions before washing one.
Microfiber cloths and washable dishcloths are often easier to maintain through regular laundry. Dry them completely before using or storing them.
Q
How often should I replace a kitchen sponge if I cook every day?
If you cook and wash dishes every day, replacing a traditional sponge about once a week is a sensible routine. Heavy use can cause the sponge to collect more food residue and moisture.
Sanitize it regularly and replace it sooner if it becomes slimy, smells bad, or is used for a contaminated spill.
Q
Are natural kitchen sponges safer than synthetic sponges?
Not automatically. Natural and synthetic sponges can both collect moisture, food residue, and microorganisms during normal kitchen use.
The material alone does not prove that a sponge is safer. Look for clear cleaning instructions, allow it to dry fully, and follow an appropriate replacement schedule.
Q
Can I reuse a kitchen sponge after cleaning raw chicken juice?
No. The safest practical choice is to throw away a sponge after it has absorbed raw chicken juices. Do not return it to ordinary dishwashing, even after rinsing or sanitizing.
Use paper towels for raw poultry spills, dispose of them safely, and clean and sanitize the affected surface with a suitable product.
Q
What is the best alternative to a kitchen sponge?
A dish brush or washable microfiber cloth can be a useful alternative. Brushes often dry faster because water drains through the bristles, while cloths can be washed regularly.
Whichever tool you choose, clean it according to its care instructions and replace it when worn or difficult to sanitize.
✦ Wrapping Up
Conclusion
A traditional kitchen sponge should generally be replaced every 1 to 2 weeks. This simple routine helps reduce the chance of using an old cleaning tool that may hold food residue and harmful microorganisms.
Do not wait for a sponge to fall apart before replacing it. A bad smell, slimy feel, visible mold, unusual discoloration, or damaged material means it is time for a fresh one. Also, throw away any sponge used to clean raw meat or poultry juices.
Between replacements, rinse the sponge after each use, squeeze out extra water, let it dry in an open holder, and sanitize it regularly using a suitable method. Keep separate tools for dishes, countertops, and raw food spills.
A clean kitchen does not require a complicated routine. A fresh sponge, a few good habits, and the right cleaning tools can make everyday dishwashing safer and easier.
💡 Key Takeaway
Replace your kitchen sponge every 1 to 2 weeks, sanitize suitable sponges regularly, let them dry between uses, and throw them away immediately after contamination or signs of damage.