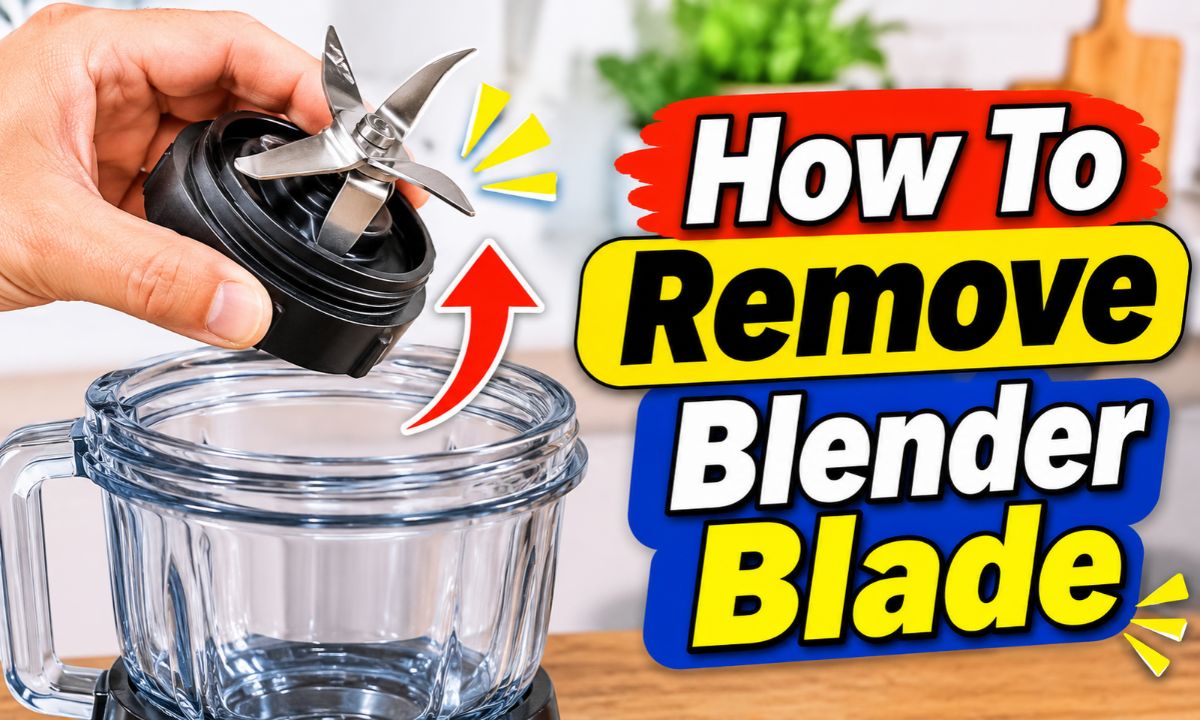
Unplug the blender, remove the jar, and check the manual before turning the blade assembly or retaining ring counterclockwise. Some blender blades are removable, while others are fixed in place.
A blender is a common kitchen tool in American homes. It helps make smoothies, sauces, soups, dips, and frozen drinks. But food can get trapped around the blade, and the jar may need a deep clean or a new seal. In these cases, you may wonder how to remove the blade without damaging the blender.
The right method depends on the blender brand and model. Some jars have a removable blade assembly that twists off by hand. Others use a threaded collar or a special retaining nut that needs a tool. Some modern blenders have fixed blades that are not meant to come out at all.
Before you start, unplug the blender and let all moving parts stop. Never hold a sharp blade with bare fingers. Check the owner’s manual to see which parts can come apart. A few careful steps can help you clean or replace the right part without cracking the jar or damaging its seal.
No. Some blenders have removable blade assemblies, while others have blades that stay attached to the jar. The design determines whether you can remove the blades for cleaning, repair, or replacement.
A removable assembly often has a threaded collar, a bottom cap, or a retaining nut. These parts hold the blade unit against the bottom of the jar. A rubber gasket sits between the parts to help prevent leaks.
Other blenders use a fixed blade system. The blade stays in place, even when you remove the jar from the motor base. You can still clean these jars, but you should not try to pull out the blade.
The brand name alone does not tell you which method to use. A single manufacturer may sell several jar styles with different blade designs. Check the model number on the blender base or jar and find the matching owner’s manual.
Removable blade assembly
The blade unit can come out of the jar after you release its threaded collar or retaining nut.
Fixed blade assembly
The blades stay attached to the jar. Clean around them without trying to remove the unit.
Personal blender blade unit
Many personal blenders use a separate blade lid that screws onto the cup. It may twist off after you remove the cup from the motor base.
Special-tool blade assembly
Some full-size blenders use a retaining nut that needs a model-specific wrench. A standard wrench may not fit or may damage the part.
How to Identify a Removable Blender Blade
Turn off and unplug the blender. Remove the jar from the motor base and look at its bottom. A separate plastic collar, metal retaining nut, or threaded blade housing may show that the assembly can come apart.
Look for a seam between the blade housing and the jar. Check the manual for a removal diagram. Do not treat a visible seam as proof that the blades are removable. Some jars have a fixed assembly with a separate outer cover.
If the manual says the blade unit is not removable, stop there. Use the cleaning method listed by the manufacturer instead.
Check the model number
Look under the motor base, on the back label, or on the jar. Use the exact number when searching for instructions.
Inspect the bottom
Look for a collar, retaining nut, threaded cap, or separate blade housing.
Read the removal instructions
Confirm that the manufacturer allows the blade assembly to come out before applying force.
Tools and Supplies You Need
You do not need a large toolbox to remove most blender blades. The parts and tools depend on the design. Gather the items before starting so you do not need to handle a loose blade while looking for something else.
A clean, dry work area also helps. Place a soft towel on the counter to keep the jar from sliding or getting scratched. Keep small parts in a bowl so they do not roll away.
Owner’s manual
This is the most useful item. It shows whether the blade is removable and which direction to turn the collar or nut.
Thick kitchen towel
Use it as a barrier between your hand and the sharp blade edges. A towel also helps you grip parts without scratching them.
Manufacturer-approved wrench
Some blade assemblies need a special retaining-nut wrench. Use the correct tool for your model.
Soft dish brush
A brush with a handle helps remove food from around the blade without putting your fingers near the edges.
Warm water and dish soap
Use these to clean washable parts after removal, following the care instructions for your jar and blade assembly.
Small parts tray
Use a small bowl to hold the collar, retaining nut, and other loose parts during the job.
Tools You Should Avoid
Do not use a kitchen knife, screwdriver, or random metal tool to pry the blade housing out. These tools can slip, cut your hand, or crack the jar.
Avoid locking pliers unless the manufacturer specifically approves them. They can crush plastic parts and damage threaded surfaces. Do not use a power tool to loosen a blade assembly.
No bare-hand blade gripping
Sharp edges can cause cuts even when the blades are not moving.
No uncontrolled force
A stuck part may have a damaged thread or a design that does not allow removal.
No random replacement tools
Use a tool that fits the retaining nut and is approved for the exact blender model.
How to Remove a Blender Blade Step by Step
For a blender with a removable threaded blade assembly, the usual process is to unplug the unit, remove the jar, turn the jar upside down, release the locking part, and lift out the blade unit. The exact order and turning direction can differ by model.
Use these steps only if your manual confirms that the blade assembly can be removed. If your blender has a fixed blade, do not follow the removal steps.
Step 1: Turn Off and Unplug the Blender
Switch the blender off and unplug the power cord from the wall outlet. Do not rely on the control button alone. Removing the plug prevents an accidental start while your hands are near the blades.
If you have just blended hot food, allow the jar and its contents to cool before handling them. Hot liquid can spill when you move the jar. Never remove the blade assembly while the motor is running.
Check the power
Make sure the cord is fully disconnected from the outlet.
Wait for the motor to stop
Do not touch the jar or blades while any part is still moving.
Let hot contents cool
Empty and cool the jar according to the manufacturer’s instructions before taking it apart.
Step 2: Remove the Blender Jar From the Base
Hold the jar firmly by its handle or the grip area. Lift it from the motor base after the blender has stopped. Some jars lift straight up, while others need a short twist to unlock.
Do not pull the jar by the blade assembly or carry it by a loose bottom cap. Set it on a flat, dry towel. Keep the motor base away from water.
Use the handle
Hold the jar in a way that keeps it stable as you lift it.
Check the locking style
Follow the manual if your jar needs to turn before it comes off the base.
Set it down securely
Place the jar on a stable surface before turning it upside down.
Step 3: Empty and Rinse the Jar
Pour out any remaining food or liquid. Rinse away loose bits of fruit, vegetables, sauce, or other ingredients. This makes the bottom easier to handle and helps you see the blade housing.
Do not use your fingers to remove food caught between the blades. Use a long-handled dish brush or another cleaning tool that keeps your hands away from the sharp edges.
Remove loose food
Rinse the jar with water while keeping your hands clear of the blade edges.
Check for trapped pieces
Look around the blade hub and gasket for food that may block the assembly.
Step 4: Turn the Jar Upside Down
Place the empty jar upside down on a soft towel if the manual shows that this is the correct removal position. The bottom opening should face up so you can reach the retaining part.
Keep the jar steady. Do not press down hard on the glass or plastic. A firm but gentle grip is enough for most designs.
Protect the jar
Use a clean towel to reduce scratches and prevent the jar from sliding.
Keep the work area clear
Move loose items away so you can focus on the blade assembly.
Step 5: Locate the Locking Ring or Retaining Nut
Look at the bottom of the jar for the part that holds the blade assembly in place. Depending on the design, this may be a plastic collar, a threaded bottom cap, or a metal retaining nut.
The retaining part is not always the same as the blade hub. Do not loosen small screws on the blade assembly unless the manual clearly identifies them as service parts. Some screws are not intended for user removal.
If you cannot identify the locking part, stop and check the manual. Guessing can damage the jar or cause the blade unit to come loose unexpectedly.
Plastic collar
This may twist off by hand on some conventional blender jars.
Threaded blade housing
Some personal blenders use a blade lid that unscrews from the cup.
Metal retaining nut
Some full-size containers need a special wrench to loosen this part.
Step 6: Loosen the Retaining Part
Follow the turning direction in your manual. Many threaded blender collars and retaining nuts loosen counterclockwise when viewed from the side where the tool engages, but you should not assume every model uses the same arrangement.
If your model uses a hand-removable collar, grip it with a dry cloth and turn it in the specified direction. If it uses a special retaining nut, fit the approved wrench into the correct grooves and turn it slowly.
Keep the jar stable as you work. Use steady pressure rather than sudden force. Stop if the part twists unevenly, the plastic begins to flex, or you hear cracking.
Follow the manual
Use the stated direction and removal tool for your exact model.
Work slowly
Small, controlled movements are better than jerking the wrench or collar.
Stop if resistance feels abnormal
The assembly may be damaged, seized, or designed to remain in place.
Step 7: Remove the Collar or Retaining Nut
Once the locking part is loose, finish removing it by hand if the manual allows. Place it in your parts tray. Keep any gasket or washer in place unless the manufacturer says it should be removed for cleaning or replacement.
Some retaining nuts have a seal that should stay attached. Pulling it off can damage the seal or make it harder to reinstall the assembly correctly.
Keep every part
Do not discard a collar, nut, washer, or gasket that belongs to the original assembly.
Inspect the threads
Look for cracks, worn threads, or food buildup before continuing.
Step 8: Lift Out the Blade Assembly
Cover the blade unit with a thick, dry cloth if the manufacturer recommends this method. Carefully grip the assembly through the cloth and lift it straight out of the jar. Avoid touching the cutting edges.
Do not twist, bend, or pull the blades sideways. If the assembly does not lift out after the retaining part has been removed, check whether another locking feature is present. Never pry against the jar with a sharp tool.
Set the removed assembly on a stable surface with the blades protected. Keep it away from children, pets, and the edge of the counter.
Protect your hands
Use a thick cloth and keep your fingers away from the cutting edges.
Lift straight
Avoid side pressure that could damage the blade shaft or jar opening.
Check the gasket
Look for a separate sealing ring and note its position before cleaning.
How to Remove a Blender Blade From a Personal Blender
Personal blenders often use a different setup from full-size countertop models. Many have a blade assembly that screws directly onto the drinking cup. You may need to remove the cup from the motor base before taking off the blade lid.
KitchenAid’s cordless personal blender instructions, for example, describe removing the cup from the base and then turning the blade assembly counterclockwise. This is a documented method for that product, not a rule for every personal blender.
Personal Blender Removal Steps
First, switch off the blender and disconnect its power source. For a cordless model, follow the manual’s battery or power isolation instructions. Remove the cup from the motor base without pressing down on it.
Set the cup upright on a dry surface. Hold the cup firmly and turn the blade lid in the direction shown in the manual. On models with standard right-hand threads, the blade lid may loosen counterclockwise.
Once the lid comes free, lift it away carefully. Keep the blades pointed away from your hands. Check the seal before washing the cup and blade assembly.
Remove the cup first
Do not try to unscrew the blade unit while the cup is locked into the running base.
Use a steady grip
Hold the cup body rather than gripping the blade edges.
Check the seal
Make sure the rubber seal is present and in good shape before reassembly.
How to Remove a Stuck Blender Blade
A stuck blade assembly may be caused by dried food, a tight threaded collar, a damaged seal, or a worn retaining part. Do not assume that more force will solve the problem. Too much pressure can crack the jar or damage the threads.
Start with the least risky checks. Confirm that the assembly is meant to come apart. Then look for dried food around the collar and use a cleaning method that the manufacturer allows.
Method 1: Clean Around the Threads
Food residue can dry around the collar and make the parts difficult to turn. If the manual permits washing the assembled jar, rinse the outside of the blade housing with warm water and a little dish soap.
Keep water away from the motor base and electrical parts. Do not immerse the base. Allow the jar to cool first if it was used with warm ingredients. Try the approved removal method again after cleaning the outside of the joint.
Use warm water
Warm water may soften dried food around a removable collar. Avoid boiling water or sudden temperature changes.
Use a soft brush
Clean the visible joint without pushing a brush into the sharp blade area.
Method 2: Improve Your Grip
A slippery collar can be hard to turn, especially when it has oil or food residue on it. Dry the outside of the jar and collar fully. Use a clean, dry rubber grip pad or cloth if the manual allows hand removal.
Hold the jar securely and apply slow, even pressure. Do not squeeze a plastic jar hard enough to bend it. If the collar does not move, stop rather than increasing the force.
Dry the parts
Moisture and grease can make a threaded collar harder to grip.
Avoid metal gripping tools
Pliers can damage the collar and may cause the tool to slip.
Method 3: Use the Correct Retaining-Nut Wrench
Some blender containers use a special retaining nut. A normal wrench may not fit the grooves, and an incorrect tool can round off the nut. Check the manual or contact the manufacturer to identify the correct wrench.
Vitamix manuals for certain containers describe using a dedicated retainer-nut wrench and turning the nut counterclockwise. They also warn against removing the blade assembly unless it is necessary. This method should only be used with a compatible container and tool.
If the correct wrench does not loosen the nut with controlled pressure, stop. A service center may need to inspect the assembly.
Confirm compatibility
Match the wrench to the exact blender container and retaining nut.
Keep the container steady
Prevent the jar from rolling or shifting as you turn the tool.
Do not force the nut
Stop if the wrench slips, the nut becomes damaged, or the container shows signs of cracking.
When You Should Stop Trying
Stop if the jar is cracked, the blade shaft is bent, the retaining nut is stripped, or the collar turns without releasing. These signs may point to a damaged assembly rather than a simple cleaning problem.
A fixed blade assembly is another reason to stop. If the manufacturer does not provide a removal procedure, do not try to make one. Contact customer support or a qualified appliance repair service.
Cracked jar
A cracked container can leak or break during use. Replace it with a compatible part.
Stripped threads
A damaged thread may not hold the blade assembly securely after reassembly.
Bent blade shaft
A bent shaft can affect blade movement and may cause vibration or leakage.
Fixed blade design
Use the approved cleaning method instead of attempting removal.
How to Clean a Blender Blade After Removing It
Clean the blade assembly as soon as possible after removal. Dried food can collect around the hub, gasket, and underside of the blade unit. A gentle wash can remove this residue without damaging the parts.
Check the manufacturer’s cleaning instructions first. Some blade assemblies are dishwasher-safe, while others require hand washing. Even when a part is dishwasher-safe, the approved rack and drying method may differ.
Hand-Washing Method
Fill a sink or wash basin with warm water and mild dish soap if the manual allows it. Hold the blade assembly by its outer housing, not by the cutting edges. Use a long-handled dish brush to clean around the blades and hub.
Move the brush away from the cutting edges rather than pushing it toward your fingers. Rinse the assembly well and place it on a clean drying rack. Do not wipe the sharp edges with a cloth held in your hand.
Use mild soap
A small amount of regular dish soap is usually enough for food residue.
Choose a handled brush
A long handle keeps your hands farther from the blades.
Rinse carefully
Remove soap and loose food while keeping your hands clear of sharp edges.
Air-dry fully
Let the parts dry before putting them back together.
Can You Put Blender Blades in the Dishwasher?
It depends on the model. Some manufacturers allow the blade assembly on the top rack of a dishwasher. Others require hand washing or give different instructions for the jar, lid, and blade unit.
Do not assume that a dishwasher-safe jar means every part is safe for every cycle. Check the manual for rack placement, heated drying limits, and any parts that must be removed before washing.
If the manual allows dishwasher cleaning, place the blade unit securely so it cannot fall or strike other dishes. Remove it after the cycle if the care instructions call for prompt drying.
Check the manual
Confirm dishwasher safety for the blade assembly itself, not just the jar.
Use the stated rack
Some models allow blade assemblies only on the top rack.
Avoid unapproved heat
Heated drying can affect some seals or plastic parts.
How to Clean the Rubber Gasket
The gasket is the rubber or silicone ring that helps seal the joint between the jar and blade assembly. Food can collect around it, which may cause odors or interfere with a proper seal.
If the manufacturer allows gasket removal, take it off gently and wash it with mild soap and water. Do not stretch it, cut it, or use a sharp tool to pry it away from the blade housing.
Inspect the ring for cracks, flattening, tears, or hard spots. Replace a damaged gasket with the correct part for your model. Do not use a random rubber ring as a substitute.
Look for damage
A split, stretched, or hardened gasket may no longer seal the jar.
Clean both sides
Remove food residue from the gasket and its seating area when the manual permits removal.
Keep the correct fit
Use a compatible replacement seal if the original one is worn.
How to Reinstall the Blender Blade Correctly
Reinstall the blade assembly only after all parts are clean, dry, and free from damage. A loose blade unit or misplaced gasket can cause leaks. It can also allow the assembly to move during blending.
The correct order depends on the jar design. Some models place the gasket on the blade assembly before inserting it into the jar. Others use a seal that stays on the retaining nut or collar. Follow the model-specific diagram.
Step 1: Inspect Every Part
Look at the blades, shaft, collar, retaining nut, and gasket. Check for cracks, chips, rust, bent parts, or worn threads. Do not reinstall a damaged assembly.
Make sure the jar opening is clean. Food trapped in the threads can prevent the collar from seating correctly.
Check the blade edges
Look for visible damage without running your fingers along the cutting edges.
Check the gasket
Make sure it is clean, undamaged, and placed in the correct position.
Check the threads
Look for worn or cracked areas that could prevent a secure fit.
Step 2: Position the Gasket
Place the sealing ring where the manual shows. On some traditional jars, the gasket sits between the blade assembly and the jar opening. Other designs have a seal attached to a separate retaining part.
Do not add extra seals or use adhesive to hold the gasket in place. The wrong position can prevent a proper seal.
Use the original arrangement
Follow the diagram for your exact blender model.
Avoid twisting the ring
A twisted gasket may leave a gap and cause leakage.
Step 3: Insert the Blade Assembly
Hold the blade assembly through a thick cloth if needed. Align it with the opening and lower it into place as directed. Make sure the assembly sits evenly rather than leaning to one side.
Do not force it into the jar. If it does not fit, remove it carefully and check the gasket position and alignment.
Align the parts
Match any flat sides, tabs, or alignment marks shown in the manual.
Keep the assembly level
An uneven fit can damage the threads or sealing surface.
Step 4: Tighten the Collar or Retaining Nut
Place the collar or retaining nut back in its correct position. Turn it by hand first if the manual allows. This helps the threads engage without crossing them.
Tighten in the direction specified by the manufacturer. Some designs need a special wrench for the final tightening step. Do not overtighten a plastic collar or use extra force to make the assembly feel secure.
A properly fitted assembly should sit evenly and feel secure according to the manual. If the collar will not engage smoothly, take it apart and check the alignment.
Start by hand
This helps reduce the risk of cross-threading.
Use the correct tool
Use a manufacturer-approved wrench if the model requires one.
Do not overtighten
Excess force can damage the threads, jar, or retaining part.
How to Check for Leaks After Reassembly
Check the jar for leaks before using it to blend food. A simple water check can reveal a poorly seated gasket or loose retaining part. Do this with the jar off the motor base.
Place the empty jar upright on a dry surface. Add a small amount of cool water, close the lid if needed, and inspect the bottom for moisture. Do not turn on the motor during this check.
If water appears around the blade housing, empty the jar and inspect the gasket, threads, and retaining part. Correct the fit before using the blender. If it still leaks, replace the damaged seal or have the assembly checked.
Use a small amount of water
You do not need a full jar to check the seal.
Keep the motor base dry
Never place a leaking jar on an electrical base.
Look under the jar
Check the joint around the blade assembly for drops or damp areas.
Repeat after adjustments
Check again after correcting the gasket or tightening the retaining part.
Signs the Blade Assembly Is Installed Correctly
A correctly installed assembly sits evenly in the jar opening. The collar or retaining nut engages as intended, and the gasket does not stick out or fold over.
The jar should pass the manufacturer’s leak-check procedure before you return it to normal use. If the blade unit moves, the jar leaks, or the threads feel loose, do not operate the blender.
Even fit
The assembly sits straight and does not lean in the opening.
Secure locking part
The collar or nut is fitted according to the manufacturer’s instructions.
No visible leakage
The water check does not show moisture around the bottom seal.
No damaged parts
The gasket, threads, and blade housing remain in good condition.
Common Mistakes to Avoid When Removing Blender Blades
Most problems happen when someone assumes all blender jars use the same design. A method that works on one jar may damage another. Check the manual before using a tool or turning a locking part.
Trying to remove a fixed blade
Some blades are permanently attached to the jar. Trying to pull them out can damage the container and create sharp broken edges.
Forgetting to unplug the blender
Always disconnect the power before working near the blade assembly.
Holding the blade with bare hands
Even a stationary blade can cut your fingers. Use a thick cloth or the approved handling method.
Turning the wrong part
The blade hub, retaining nut, and outer collar serve different purposes. Identify the correct locking part first.
Using too much force
Excess force can strip threads, crack plastic, or damage a glass jar.
Removing screws without instructions
Small screws may hold parts that are not designed for user service. Do not loosen them unless the manual directs you to.
Losing the rubber gasket
The gasket is essential to the seal. Keep it with the other parts and check its position before reassembly.
Reinstalling a wet or dirty assembly
Food residue or a twisted seal can prevent the parts from fitting correctly.
Running the blender to test a loose assembly
Never use the motor to see whether a loose blade unit will settle into place. Correct the assembly first.
Why You Should Not Force a Blender Blade
A blender jar is made to hold a specific assembly in a specific way. Forcing a collar or blade unit can damage the threads or sealing surface. Even a small crack may lead to a leak during later use.
A loose blade unit can also move while the motor runs. If you cannot remove the part with the correct method and tool, contact the manufacturer instead of trying a stronger grip.
Protect the jar
Avoid bending, twisting, or striking the container.
Protect the blade shaft
Do not use the blades as a handle or lever.
Protect the seal
Do not cut, stretch, or pry at the gasket.
Troubleshooting Blender Blade Removal Problems
If the blade assembly will not come out, identify what is happening before trying another method. A tight collar, fixed blade design, damaged thread, and food buildup need different solutions. The table below helps you choose the next safe check.
The collar will not turn
Check whether food has dried around the threads. Clean the visible joint if the manual permits it, dry the parts, and use the approved grip or wrench.
The blade unit will not lift out
Check for another locking feature or a model-specific removal step. Do not pry it out with a knife or screwdriver.
The retaining nut keeps slipping
The tool may be the wrong size or the nut may be damaged. Stop and obtain the correct wrench.
The jar leaks after reassembly
Inspect the gasket and threads. Check that the seal is in the correct position and the retaining part is fitted as directed.
The blade assembly feels loose
Do not run the blender. Check the locking part and threads, and replace damaged components with compatible parts.
The blade does not rotate after reassembly
Turn off and unplug the unit. Check for incorrect assembly or a damaged drive connection. Seek service if the problem remains.
What If the Blade Assembly Is Rusted?
Visible rust or corrosion on a blade assembly is a reason to inspect it closely. Surface discoloration can have different causes, but pitted metal, flaking material, or damaged cutting edges should not be ignored.
Do not use strong acids, harsh chemicals, or abrasive tools on the assembly unless the manufacturer specifically approves them. Replace a badly corroded blade unit with a compatible part.
Inspect the metal
Look for pitting, flakes, deep discoloration, and damage around the shaft.
Check the seal
Corrosion near the gasket may affect the fit and seal.
Replace damaged parts
Do not use a blade assembly with structural damage or badly corroded cutting parts.
What If the Blade Assembly Is Leaking?
A leak around the bottom of the jar often points to a seal or assembly problem. The gasket may be missing, twisted, worn, or incorrectly positioned. The retaining part may also be loose or damaged.
Stop using the blender until you find the cause. Water or food liquid can reach the motor base and create an electrical hazard or damage the appliance.
Check the gasket
Look for tears, cracks, flattening, or a poor fit.
Check the collar
Make sure it is aligned and secured as the manual requires.
Inspect the jar
Replace a cracked or damaged jar rather than trying to seal it with glue.
When Should You Replace the Blender Blade Assembly?
Replace the blade assembly when it has damage that affects safe use or proper operation. A blade that is bent, cracked, badly corroded, or loose should not remain in service. The same applies to a retaining part with damaged threads that cannot hold the assembly securely.
A dull blade does not always mean you need to replace the whole blender. Some manufacturers sell replacement blade assemblies, gaskets, or retaining parts. Check compatibility by exact model number before buying anything.
If the blade is fixed to the jar, the manufacturer may require replacement of the complete jar rather than a separate blade. Do not assume a blade from another model will fit.
Replace a bent blade
A bent blade can cause poor blending and abnormal vibration.
Replace a cracked assembly
Cracks can spread and may cause the part to fail during use.
Replace a damaged gasket
A worn seal can allow liquid to leak from the jar.
Replace stripped locking parts
A collar or nut that cannot hold the assembly securely should not be reused.
Use compatible parts
Match the replacement to the blender’s exact model and container type.
How to Find the Correct Replacement Part
Find the model number on the motor base, jar, or product label. Write it down before contacting the manufacturer or looking for a replacement part.
Compare the part number, jar size, locking design, and blade assembly shape. Similar-looking parts may use different threads or seals. A part that almost fits is not a safe substitute.
If you cannot confirm compatibility, ask the manufacturer or an authorized service provider. They can help identify whether you need a blade assembly, gasket, retaining nut, or complete jar.
Record the model number
Use the full number, including any letters or suffixes.
Match the container
Confirm that the part fits the correct jar or personal blender cup.
Check the seal design
Make sure the replacement includes the correct gasket arrangement.
How Often Should You Remove Blender Blades for Cleaning?
You do not need to remove the blade assembly after every use. In fact, some manufacturers advise against removing it unless necessary. Regular cleaning with the blade installed may be enough for everyday food residue.
Clean the jar after each use and pay attention to food trapped around the blade hub. Remove the assembly only when the manual permits it and a deeper clean or part replacement is needed.
If you blend sticky foods, nut butter, thick sauces, or ingredients that leave residue, clean the jar promptly. Dried food can become harder to remove and may collect around the seal.
After every use
Clean the jar and accessible blade areas using the approved cleaning method.
During deep cleaning
Remove the blade assembly only if the manufacturer allows it and removal is needed.
When a part needs repair
Inspect the blade assembly, gasket, and retaining parts before replacing them.
When food gets trapped
Use a handled brush and the approved cleaning method rather than reaching between the blades.
A Quick Comparison of Blender Blade Removal Methods
Different blender designs need different removal methods. This comparison shows the common arrangements and the main point to check before starting. It is a general guide, not a replacement for your model’s manual.
Hand-removable collar
The collar may twist off by hand in the direction stated in the manual. Keep the jar stable and protect your hands.
Special retaining nut
Use the correct manufacturer-approved wrench. Do not substitute an ill-fitting tool.
Personal blender blade lid
Remove the cup from the base first, then unscrew the blade lid if the model allows it.
Fixed blade system
Do not remove the blade. Clean the jar and blade area while the assembly remains attached.
Which Method Should You Choose?
The model number and owner’s manual should guide your choice. If the manual shows a removable collar, use that method. If it shows a special retaining nut, use the matching wrench. If the blade is fixed, clean it in place.
Do not choose a method based only on how another blender looks. The safest approach is the one designed for your exact jar and blade assembly.
For routine cleaning
Use the manufacturer’s normal jar-cleaning method first.
For a deep clean
Use the removal procedure only when the assembly is designed to come apart.
For repairs
Check compatible replacement parts and seek service if the locking system is damaged.
Research Notes and Important Model Differences
This guide was prepared on November 3, 2026, using manufacturer support information and blender owner manuals available for review. The sources show that blade removal is not a universal process. The exact jar design and model instructions matter more than the brand name alone.
KitchenAid’s personal blender guidance describes removing the cup and then turning its removable blade assembly counterclockwise. Its general cleaning guidance also explains that some KitchenAid countertop blender jars have fixed blades. These are different product designs, so their removal instructions should not be mixed.
Vitamix manuals for certain containers describe a special retaining-nut wrench and warn users not to remove the blade assembly unless necessary. Some Oster jar instructions describe a threaded blade assembly, sealing ring, and bottom cap. These examples show why readers should check the exact manual before using a general method.
The main improvement in this guide is the separation of removable, fixed, personal blender, and special-tool designs. It also explains how to check the gasket, test for leaks, and recognize when a stuck assembly needs service instead of more force.
Evidence type
Manufacturer manuals and support pages document model-specific assembly and care instructions. This article does not claim that the author physically tested or removed a blade.
Important limitation
No single turning direction, tool, dishwasher setting, or removal procedure applies to every blender.
Reader benefit
Identifying the blade design before starting helps prevent damage to the jar, threads, gasket, and blade unit.
Next Questions Readers May Need Answered
The main task is removing a blade assembly safely. The next useful decisions involve cleaning, checking the seal, and deciding whether a damaged part needs replacement. These needs follow directly from the removal process and are not claims about search volume.
This is a practical next step for fixed-blade jars and routine cleaning. The answer depends on the manufacturer’s cleaning instructions.
Can I use a regular wrench?
This matters when a special retaining nut is present. The correct tool must fit the exact assembly.
Why does the jar leak after reassembly?
This is a common troubleshooting need after removal. Check the gasket, threads, and retaining part.
Should I replace the blade or the whole jar?
This depends on whether the blade is sold separately and whether the jar design allows service.
Frequently Asked Questions
Q
Can I remove blender blades by hand?
Some blender blades can be removed by hand, but not all. Personal blender blade lids and certain jar collars may twist off without a tool. Other models use a special retaining-nut wrench, while some have fixed blades. Check your manual before trying to turn any part. Never grip the cutting edges with bare hands.
Q
Which way do you turn a blender blade to remove it?
Many removable threaded blade assemblies loosen counterclockwise, but the correct direction depends on the model and the part you are turning. Check the manual before applying force. Do not assume that the collar, retaining nut, and blade hub all use the same turning direction.
Q
Can I remove blender blades without a special tool?
Yes, if your blender uses a hand-removable collar or blade lid. However, some containers require a dedicated retaining-nut wrench. Do not use pliers, a screwdriver, or another tool that does not fit correctly. Contact the manufacturer if you cannot identify the correct tool.
Q
How do I remove a blender blade that is stuck?
First, confirm that the blade assembly is designed to come out. Clean visible food residue around the joint if the manual permits it, dry the parts, and improve your grip with a clean cloth. Use the correct wrench if the model requires one. Stop if the collar slips, the jar flexes, or the threads appear damaged.
Q
Can I wash blender blades without removing them?
Yes. Many blender jars can be cleaned with the blade assembly still attached. Follow the manufacturer’s instructions and use a long-handled dish brush to clean around the blades. Keep your fingers away from the cutting edges. Do not use a cleaning method that the manufacturer does not approve.
Q
Should I remove the rubber gasket when cleaning the blade?
Only remove the gasket if the manual allows it. Some seals are designed to stay attached to a retaining nut or blade assembly. If removal is permitted, wash it gently and return it to the correct position. Replace a torn, stretched, or hardened gasket with a compatible part.
Q
Can I put the blender blade assembly in the dishwasher?
That depends on the blender model. Some manufacturers allow the blade assembly on the top rack, while others require hand washing. Check the care instructions for the blade unit itself. Do not assume that a dishwasher-safe jar means every component can go through the same cycle.
Q
Why does my blender leak after I put the blade back?
A leak may mean the gasket is missing, damaged, twisted, or out of position. The retaining collar may also be loose or cross-threaded. Unplug the blender and empty the jar. Check the parts and perform the manufacturer’s leak test before putting the jar back on the motor base.
Q
Can I sharpen blender blades instead of replacing them?
Do not assume that sharpening is a suitable repair. Blender blade assemblies have specific shapes, balance, and mounting parts. Altering the cutting edges may affect how the unit works. Check the manufacturer’s repair guidance and replace a damaged or worn assembly with a compatible part when needed.
Q
What should I do if my blender blade cannot be removed?
Check whether the blade is fixed to the jar or needs a special tool. If the manual does not provide a removal method, do not force it. Contact the manufacturer or a qualified appliance repair service. A fixed blade may need to stay in place or require replacement of the complete jar.
✦ Wrapping Up
Conclusion
Removing a blender blade is not difficult when the jar is designed for it and you follow the correct steps. Start by unplugging the appliance, removing the jar, and checking the owner’s manual. Then identify the locking collar or retaining nut before trying to loosen the assembly.
Use a thick cloth to protect your hands, keep the small parts together, and handle the gasket with care. If the blade is stuck, clean the visible joint and use the correct tool instead of forcing it. Stop if you see cracks, damaged threads, or a fixed blade design.
After cleaning, inspect every part and reinstall the blade assembly as directed. Check the seal for leaks before returning the jar to normal use. If the assembly will not fit securely, replace the damaged part or ask the manufacturer for help.
💡 Key Takeaway
Before removing your blender blade, find the exact model number and check its owner’s manual. Confirm that the blade is removable, use the approved tool and turning direction, protect your hands, and perform a leak check after reassembly.